
This No-Bake NILLA Wafer Cake isn’t a cake by traditional standards. Easily make it by simply layering NILLA Wafers, pudding, and whipped topping. Then, top it all off with chocolate frosting! It’s a perfect dessert recipe for summer!
This post contains affiliate links. See our Disclosure Statement for more information.
I’m a big fan of no-bake dessert recipes in the summer. This No-Bake Raspberry Cheesecake is one of my favorites, but, sometimes I need a little chocolate or vanilla. And, sometimes both chocolate and vanilla is the way to go!
This past Easter, at our annual family egg hunt and dinner, my cousin reminded me of this layered dessert I used to make when I’d come over in the summer. It was a dessert, very similar to this one, but made with graham crackers. It’s one of those treats that everyone who’s ever tried it has loved and it’s perfect for family get-togethers! He told me after I made it for his family, he and his mom used to make it regularly.
I really wanted to share the recipe with my oldest son and all of you! I made a few modifications, but it’s still just as easy and even more delicious than the original!
Why This Recipe Works
- Using NILLA Wafers, rather than graham crackers, really enhances the overall flavor of this no-bake cake recipe.
- There’s no need to turn on the oven with this cake, making it the perfect summer dessert recipe!
- This cake is super easy to make (kids can help!) and is a great option to serve at your next party!
How to Make a No-Bake NILLA Wafer Cake
Prep!
If you’re using frozen whipped topping, you’ll need to let that defrost before you begin. You will also need to make the instant pudding.
Create!
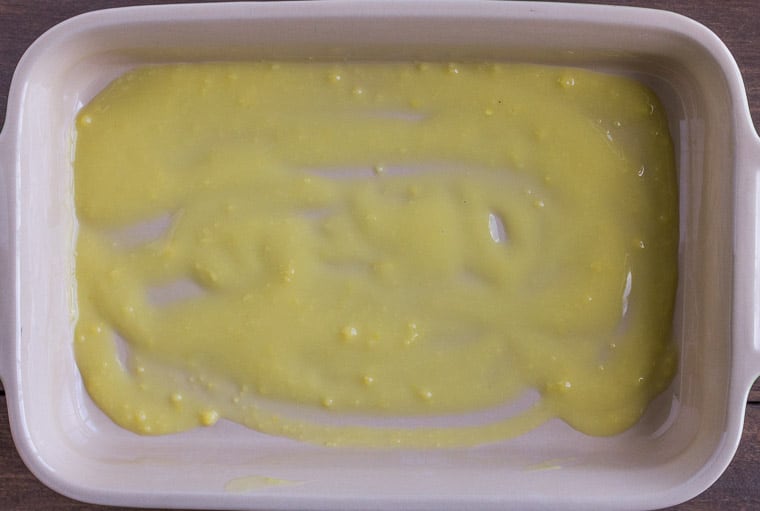
Add a spoonful or two of the pudding to the bottom of your baking dish (mine is 10.5-by-7-inches ) and spread it around. This kind of acts like “glue” to help keep the NILLA Wafers from moving as you add more toppings.

Arrange a layer of NILLA Wafers to fit the bottom of the dish. You may have to break some in half to fill in all the space.
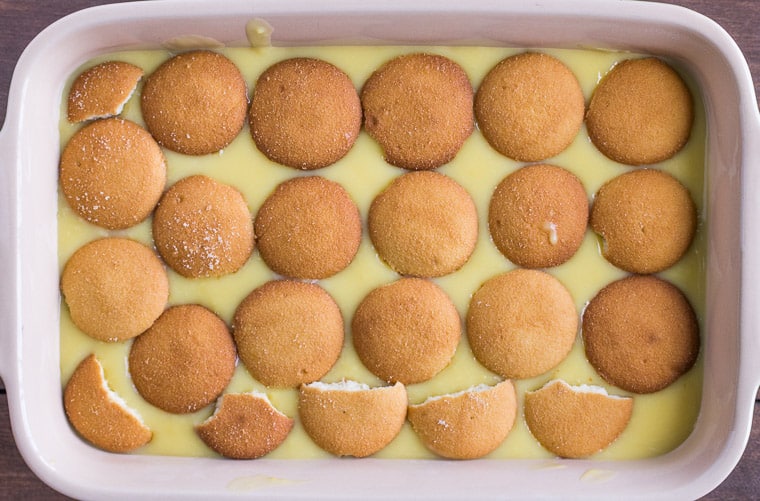
Next, spread more vanilla pudding evenly over the NILLA Wafer Layer.
Top with another layer of NILLA Wafers.
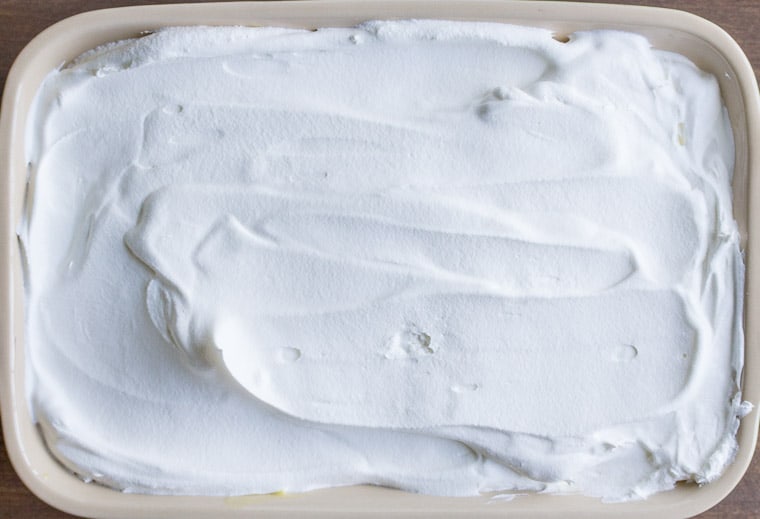
Then, evenly spread 2 cups of the whipped topping over that layer.
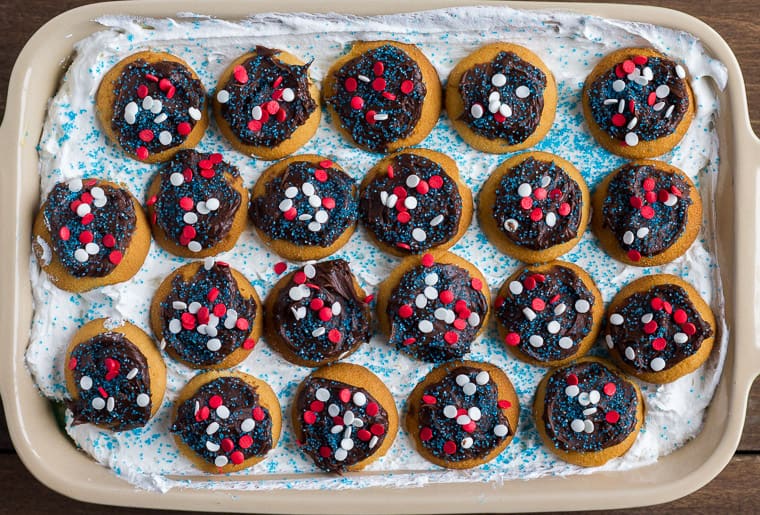
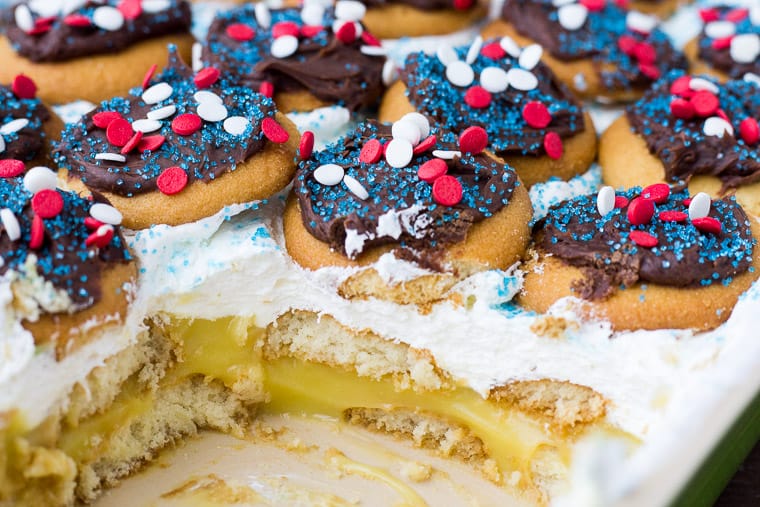
I cover the NILLA Wafers I use for the top layer with chocolate icing and decorations before putting them onto the whipped topping. It’s much easier to do the icing beforehand. I did add a few more sprinkles afterwards too.
Tip: use any color combination of sprinkles and decorations for all types of holidays and celebrations.
Present!
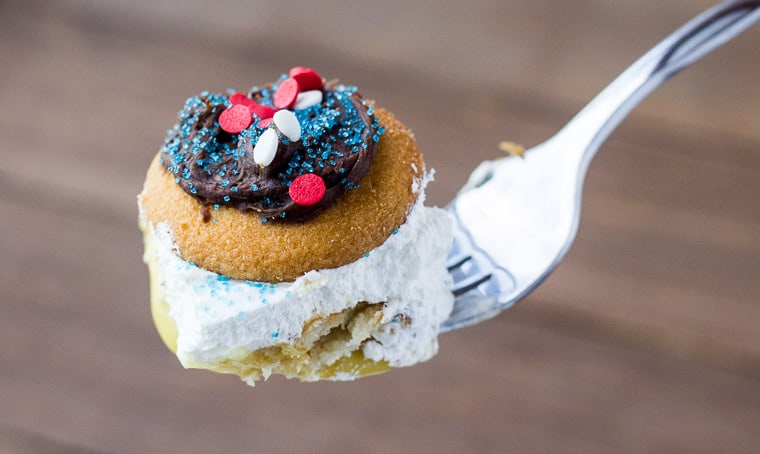
Refrigerate for at least 2 hours to allow time for the NILLA Wafers to soften. Once the NILLA Wafers are softened, you should be able to easily cut through the cake with a spatula to serve.
Enjoy!
Tips and Techniques for the Best No-Bake Nilla Wafer Cake
- Be sure to allow time for the whipped topping to fully thaw before assembling this cake.
- Use any type of sprinkles and decorations to make this cake perfect for all different types of occasions and celebrations.
- Allow at least 2 hours for the cake to be refrigerated before serving. This allows time for the NILLA wafers to soften into a more cake-like texture.
FAQ’s
- Can you use other flavors of pudding and icing? Yes, absolutely! This is an easy recipe to experiment with all types of different flavor combinations. Have fun with it!
Other Recipes to Try
- Strawberry Pie with NILLA Wafer Crumble
- Red, White, and Blue Cake with Semi-Naked Icing
- Peanut Butter Chocolate Chip NILLA Wafer Sandwiches
Love this No-Bake NILLA Wafer Cake recipe? Follow us on Pinterest, Instagram, and Facebook for more!

No-Bake NILLA Wafer Cake
Ingredients
- 1 11 oz box NILLA Wafers
- 2 cups instant vanilla pudding
- 2 cups whipped topping
- 1/4 cup chocolate icing
- sprinkles and decor * optional
Instructions
- Add a spoonful or two of the pudding to the bottom of a 10 1/2 by 7-inch (or equivalent) baking dish and spread to cover the bottom.
- Place a layer of NILLA Wafers over the pudding, breaking some in half, if necessary.
- Cover the tops of the NILLA Wafers evenly with the vanilla pudding, then add another layer of NILLA Wafers.
- Top that layer with the whipped topping.
- Ice the NILLA Wafers for the top layer with the chocolate icing and decorate before placing on top of the whipped cream.
- Refrigerate for at least 2 hours before serving to allow time for the NILLA Wafers to get soft.
Notes
Tips and Techniques for the Best No-Bake Nilla Wafer Cake
- Be sure to allow time for the whipped topping to fully thaw before assembling this cake.
- Double the recipe if you want to make a trifle or if your baking dish is larger
- Use any type of sprinkles and decorations to make this cake perfect for all different types of occasions and celebrations.
- Allow at least 2 hours for the cake to be refrigerated before serving. This allows time for the NILLA wafers to soften into a more cake-like texture.
FAQ’s
- Can you use other flavors of pudding and icing? Yes, absolutely! This is an easy recipe to experiment with all types of different flavor combinations. Have fun with it!
Nutrition
This recipe was originally published on June 13, 2018. It was updated with more thorough instructions, tips, techniques, and FAQ’s in June 2019.


Holly S. says
Mmmmm. Topping it with chocolate just makes this for me!!! Love it!
Nicole Burkholder says
I love ice box cakes! Making one with nilla wafers is genius!