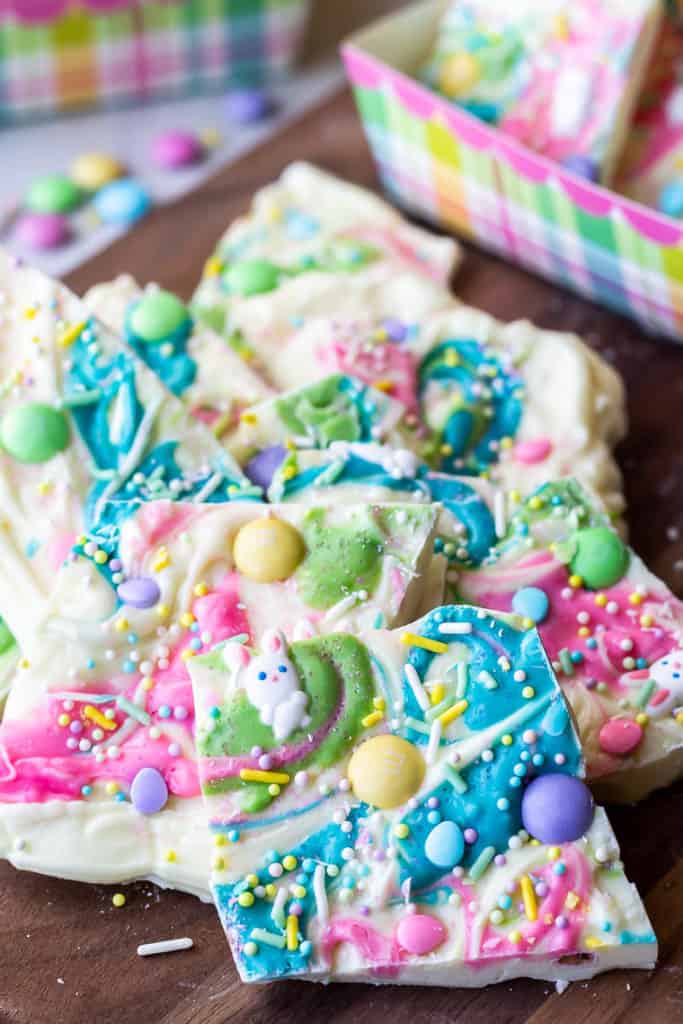
White Chocolate Easter Bark is an easy recipe for a fun holiday treat. This recipe is made with white chocolate, candy, and colorful sprinkles. It’s a great recipe to make with kids or give as gifts.
This post contains affiliate links. See our Disclosure Statement for more information.
With white chocolate Easter candy popping up all over the place, I thought it would be really fun to make a homemade white chocolate bark with an Easter theme.
I knew I wanted to swirl different colors into the white chocolate and add a variety of candy and colorful sprinkles.
This recipe is so good. It’s the perfect combination of sweet, creamy white chocolate with crunchy texture from the added candy and sprinkles.
Why This Recipe Works
This recipe is actually a really quick and easy Easter candy recipe to make. The hardest part is getting the chocolate and candy melts all melted at the same time, but I give you plenty of tips on how to do just that.
White Chocolate Easter Bark is a really fun to make. Kids can easily help with the decorations too.
You can use any combination of candy and sprinkles that you like, but I do share exactly what I used for this recipe below.
You can make this recipe for yourself, your kids, or for an Easter gathering. It also makes a great gift. You can easily package it in Easter themed gift boxes or bags.
How to Make White Chocolate Easter Bark
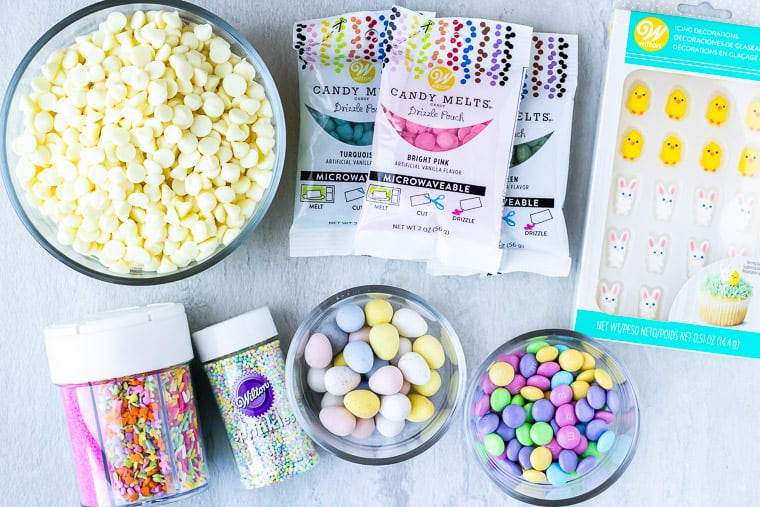
What You Need To Make This Recipe
To make this recipe you will need:
- 24 ounces white chocolate chips (or bars)
- 2 tablespoons green candy melts
- 2 tablespoons pink candy melts
- 2 tablespoons blue candy melts
- 1/4 cup Easter M&M’s (or Easter candy of your choice)
- sprinkles
Below are the ingredients and tools that I used, in addition to the items above:
- Wilton Spring Medley Sprinkles (I found these in store at Walmart, I believe)
- Wilton Spring Nonpareils Sprinkles (I also found these in a store, but I don’t remember which one)
- Wilton Easter Bunny and Chick Candy (these Bunny Feet candies are also cute!)
- Silpat Mat or parchment paper
- While I use heat proof bowls over a pots of boiling water, you can also use a double boiler to melt the chocolate.
- Toothpicks for swirling
- Extra white candy melts (I use these to make the green and pink candy melts a bit lighter)
Prep!
It’s best to have everything that you need out and ready to go. Once the melted white chocolate is spread out, you’ll need to move somewhat fast to get everything else onto it before it starts to set.
Create!
Line a large baking sheet with a Silpat Mat or parchment paper.
There are several ways that you can go about melting the white chocolate and candy melts.
I use two pots of boiling water (one large and one small) and 4 bowls so that I can melt the white chocolate over one larger pot and the candy melts over a smaller pot. You could also use one pot or a double boiler.
Tip: the candy melts won’t set up as quickly as the white chocolate so I recommend melting those first, if using just one pot.
Pour the white chocolate chips into a large heat-proof bowl or the top of a double boiler. Then, pour a couple of tablespoons of the candy melts into 3 smaller separate heat proof bowls.
Tip: if you’re using bowls, make sure that they won’t touch the boiling water in the pot. You want the bowls to sit just above the water.
Bring two pots of water to a boil. Set the white chocolate bowl over the large pot. Heat, stirring frequently, until melted and smooth. Meanwhile, place each bowl of candy melts over the smaller pot, stirring frequently, until melted and smooth.
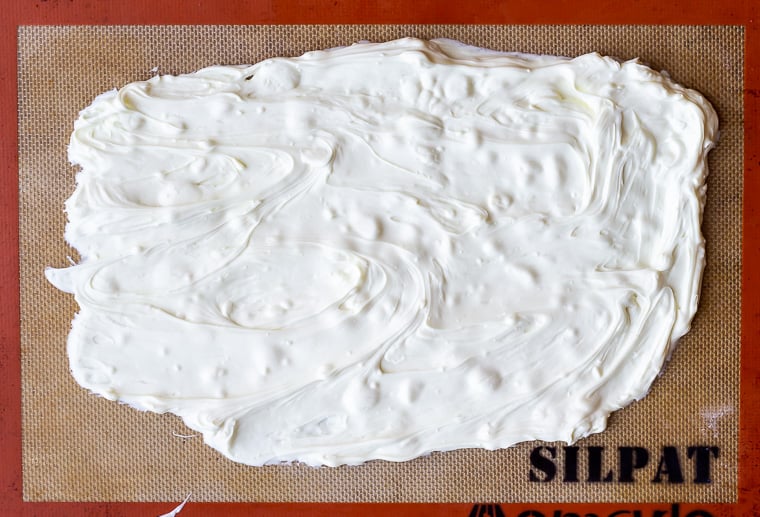
Using a silicone spatula or offset spatula, spread the melted white chocolate onto the Silpat or parchment paper lined baking sheet about 1/4-inch thick.
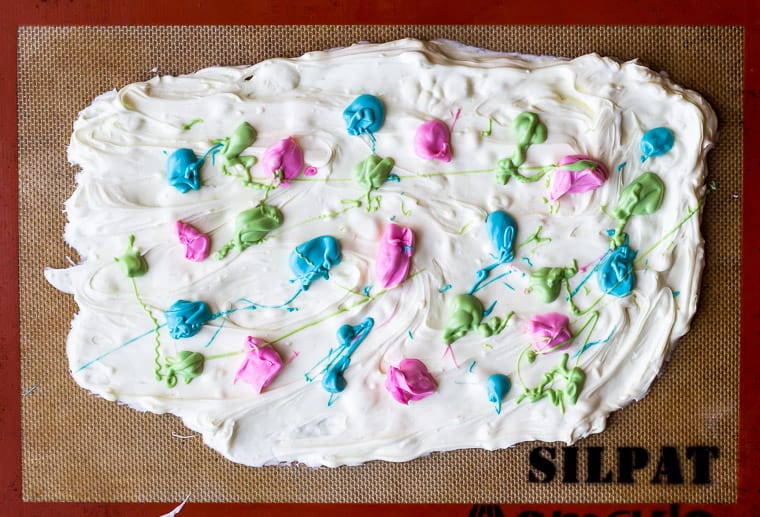
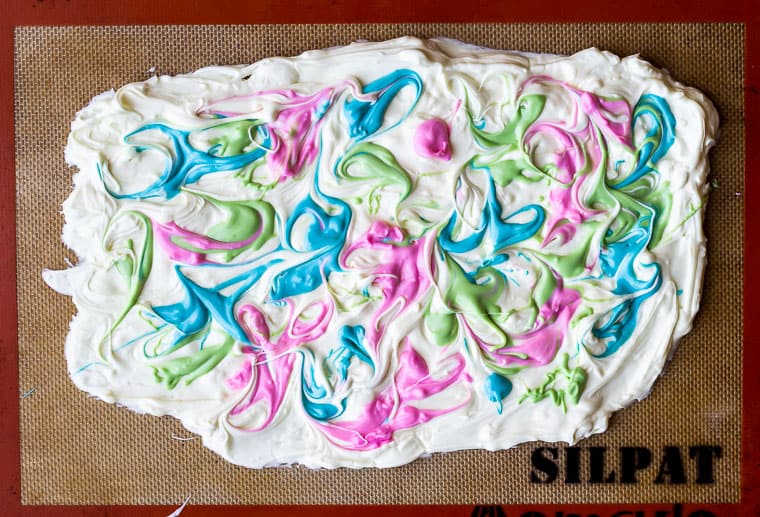
Drop spoonfuls of the melted candy melts over the top of the white chocolate.
Use toothpicks to gently swirl the drops of candy melts into the white chocolate.
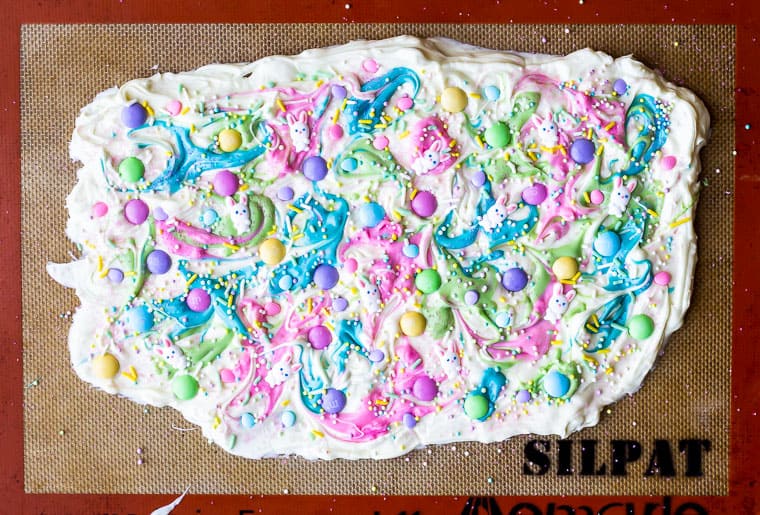
Sprinkle on the candy and sprinkles.
Place the baking sheet in the refrigerator for 30 minutes, or until the chocolate is set. You can also allow it to set at room temperature for about 2 hours.
Present!
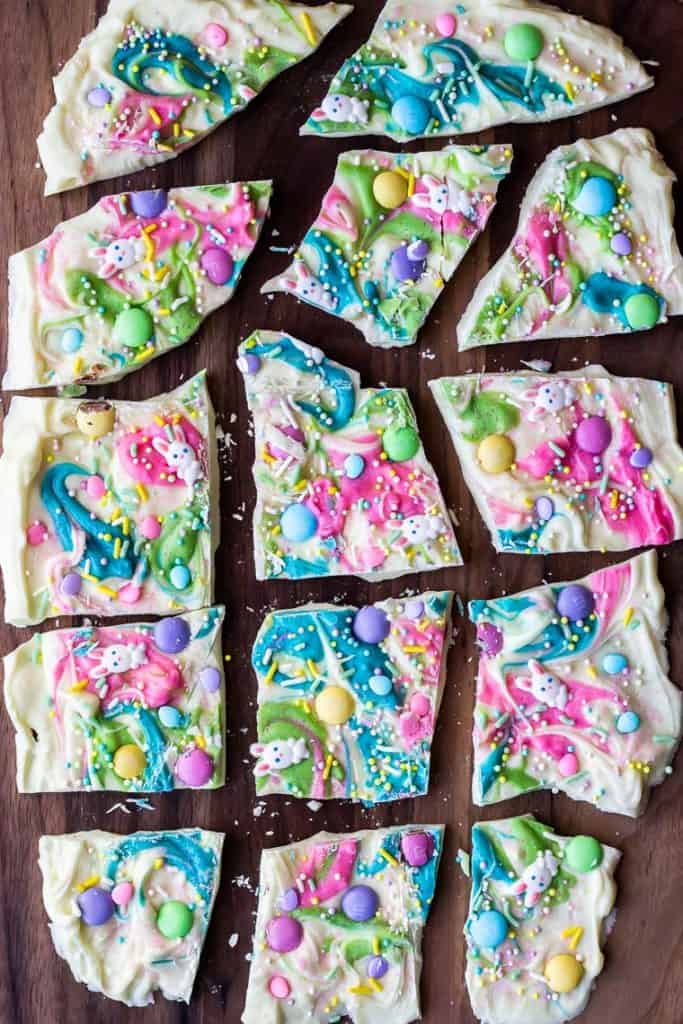
Use a knife to cut the bark into approximately 16 pieces.
Tips and Techniques
- Candy melts won’t set up as quickly as the white chocolate so it is recommend to melt those first, if using just one pot.
- If you’re using bowls over pots of boiling water to melt the chocolate and candy melts, make sure that the bowls don’t touch the boiling water in the pot. You want the bowls to sit just above the water.
- Store leftover white chocolate bark in an airtight container at room temperature (below 70°F). It will keep for 2-3 weeks. You can also store it in an airtight container in the refrigerator, if necessary.
FAQ’s
Is White Chocolate Really Chocolate?
White chocolate is actually not really chocolate. It’s primarily made from sugar, cocoa butter, and milk solids. It’s very sweet and often has vanilla flavor added to it.
More Spring and Easter Recipes To Try
- Vanilla Candy Cupcakes
- Mini Lemon Cupcakes with Lemon Buttercream Icing
- No-Bake Lemon Cheesecake Cups with Blueberry Sauce
- Eggs Benedict on Cauliflower Toast
- Easy Hollandaise Sauce (Blender Method)
- Spring Vegetable Risotto
Love this White Chocolate Easter Bark recipe? Follow me on Pinterest, Instagram, and Facebook for more!

White Chocolate Easter Bark
Ingredients
- 24 ounces white chocolate chips (or bars)
- 2 tablespoons green candy melts
- 2 tablespoons pink candy melts
- 2 tablespoons blue candy melts
- 1/4 cup Easter M&M's
- Easter sprinkles
Instructions
- Line a large baking sheet with a Silpat Mat or parchment paper.
- Pour the white chocolate chips into a large heat-proof bowl or the top of a double boiler. Then, pour a couple tablespoons of the candy melts into 3 smaller separate heat proof bowls.
- Bring two pots of water to a boil, one large and one small. You could also use a double boiler.
- Set the large white chocolate bowl over the large pot. Heat, stirring frequently, until melted and smooth.
- Meanwhile, place each bowl of candy melts over the smaller pot, stirring frequently, until melted and smooth.
- Using a silicone spatula or offset spatula, spread the melted white chocolate onto the prepared baking sheet about 1/4-inch thick.
- Drop spoonfuls of the melted candy melts over the top of the white chocolate.
- Use toothpicks to gently swirl the drops of color into the white chocolate.
- Sprinkle on the M&M's and sprinkles.
- Place the baking sheet in the refrigerator for 30 minutes, or until the chocolate is set. You can also allow it to set at room temperature for about 2 hours.
- Use a knife to cut the bark into approximately 16 pieces.
Notes
Tips and Techniques
- Candy melts won’t set up as quickly as the white chocolate so it is recommend to melt those first, if using just one pot.
- If you’re using bowls over pots of boiling water to melt the chocolate and candy melts, make sure that the bowls don’t touch the boiling water in the pot. You want the bowls to sit just above the water.
- Store leftover white chocolate bark in an airtight container at room temperature (below 70°F). It will keep for 2-3 weeks. You can also store it in an airtight container in the refrigerator, if necessary.








Cookilicious says
OMG they look so pretty..perfect snack to make with kids at home. love it
Jacqueline Debono says
This Easter bark is so pretty and such a fun recipe to make! Have to look out for those Easter M&Ms!
Amy says
Love how colourful this is, such a fun idea!
Emmeline says
I am so loving this recipe!! Those colors are amazing and make it such a fun treat, and the flavor… yum!!
Farah Maizar says
This is so festive and gorgeous, so much fun to make with kids! Thanks for the happy inducing treat