

This easy Pork Carnitas recipe is made in a slow cooker, then finished in the oven for authentic flavor and texture. Pork Carnitas can be served with tortillas and toppings, or in a variety of Mexican recipes. The possibilities are endless – and delicious!

This post contains affiliate links. See our Disclosure Statement for more information.
Pork Carnitas is a delicious, inexpensive recipe.
They can be used in so many different ways from tacos, to soups, to enchiladas, to tostadas (similar to these Chicken Tostadas) and more!
Authentic Pork Carnitas are usually made with very few ingredients and cooked in an oven.
This recipe adds in more flavors and utilizes a slow cooker to do most of the work for you with instructions on how to finish them, for just a few minutes, in the oven.
Why This Recipe Works
- This recipes is a great budget-friendly meal because it uses an inexpensive cut of pork. The pork is cooked low and slow in a slow cooker, so the tougher cut of meat actually ends up becoming very tender.
- By allowing a slow cooker to do most of the work, you will also save a lot of time.
- These Pork Carnitas are oven-finished for an authentic taste and texture. They can be served with tortillas and toppings or used in a variety of Mexican dishes.
How to Make Pork Carnitas
Prep!
Besides mincing the garlic, there really isn’t any prep work to do for this recipe.
Create!
Cut the onion in half and place it in the bottom of a slow cooker.
Place your pork roast on top of the onion, fat side up, and pour in the vegetable stock or water.
Cut the orange in half and squeeze the juice over the pork. Repeat with same steps with the lime.
Tip: you can add the spent citrus fruit halves into the slow cooker with the pork for more flavor, or discard them. If you do cook them with the pork, be sure to discard them before shredding the meat.
Add the garlic and jalapeno on to the top of the pork and sprinkle on the salt, pepper, cumin, and oregano. Lay the two bay leaves on top, as well.
Cover and cook on low for 8 hours.
Once meat is done, remove the oranges and limes, if used, and discard.
You can either remove the onion and jalapeno or shred or dice them and mix them into the pork.

Shred the pork with two forks.
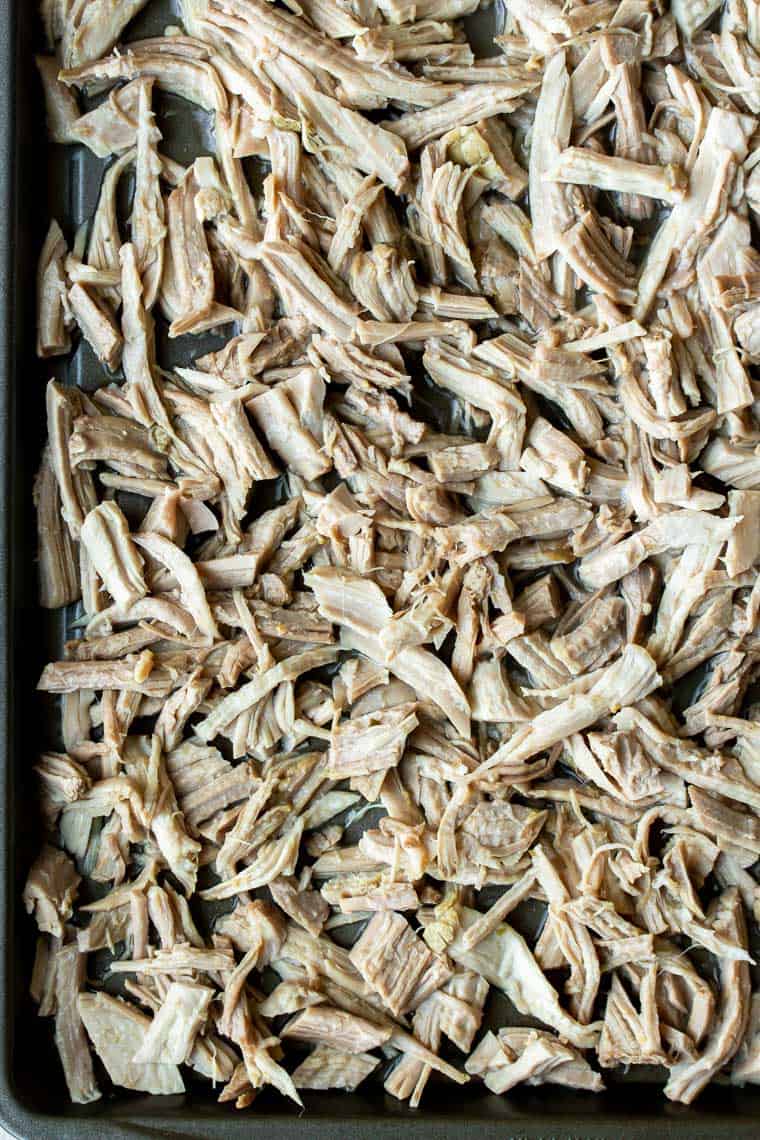
To finish the pork, remove it from the slow cooker with a slotted spoon and spread it into a baking sheet.
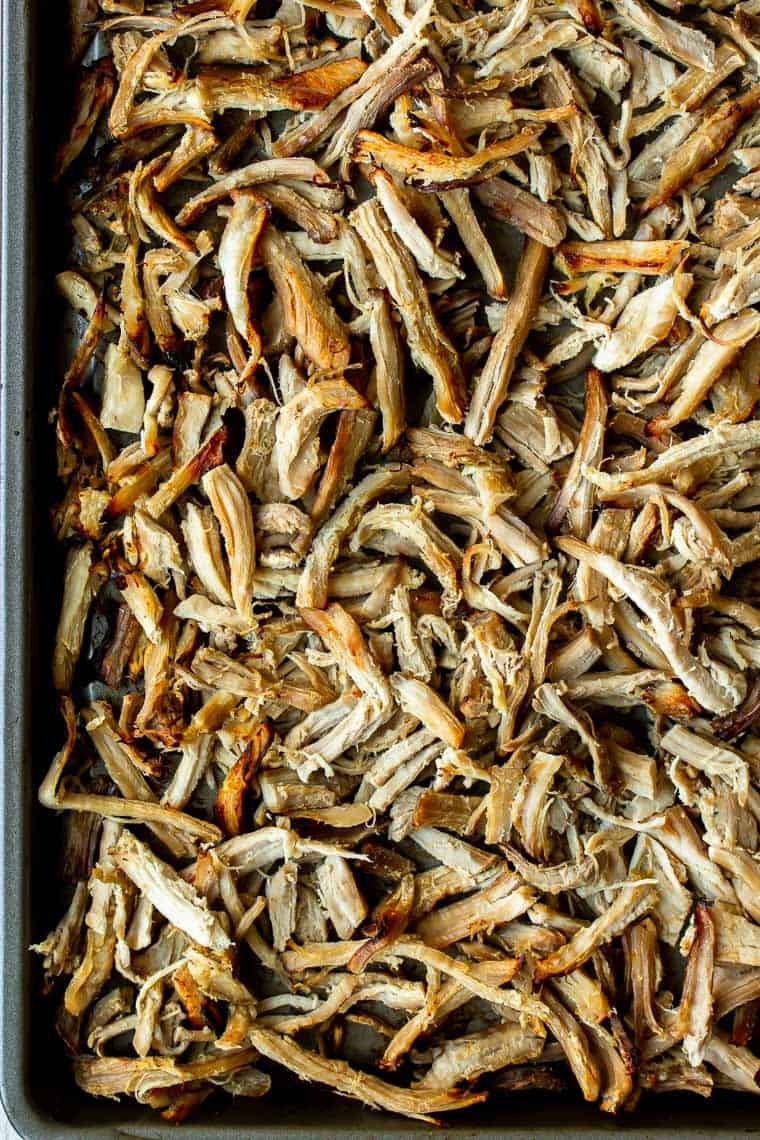
Place the baking sheet under the broiler, watching closely, until the pork turns darker brown and the ends start to get crispy.
Toss with 1/4 to 1/2 cup of the juices from the slow cooker.
Tip: while it’s not necessary to cook the pork under the broiler, this step is highly recommended, as it really does enhance the flavor.
Present!
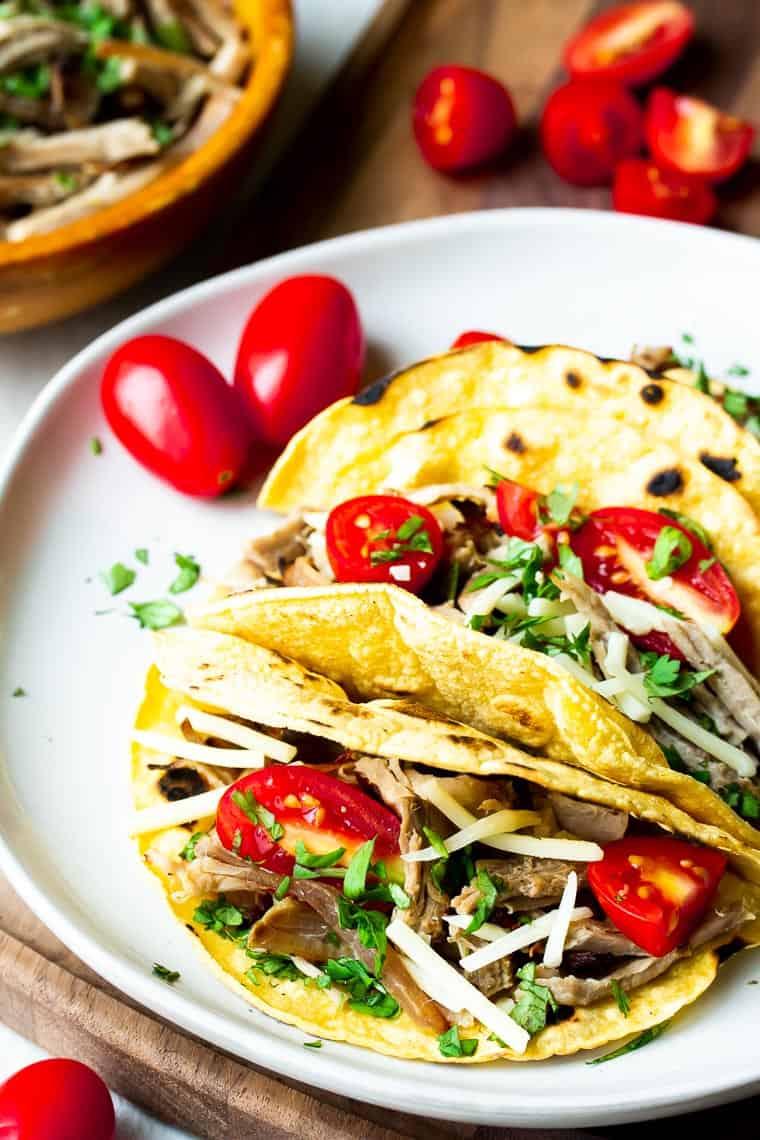
Serve with tortillas and the toppings of your choice, or use in recipes like Pork Carnitas tacos, burritos, soup, and more!
Tips and Techniques for the Best Pork Carnitas
- Add the spent orange and lime halves into the slow cooker with the pork for more flavor, if desired. If you do cook them with the pork, be sure to discard them before shredding the meat.
- It is highly recommended to finish the pork under the broiler for about 5 minutes to crisp it up. However, if you’d rather not, then it’s perfectly okay to use it straight from the slow cooker.
- Store leftovers in an air-tight container in the refrigerator. Use within 3-4 days.
FAQ’s
- What do you make with Pork Carnitas? Pork Carnitas are often served with tortillas and a variety of toppings. They can be also served in a variety of Mexican dishes. Pork Carnitas taste great in tacos and burritos, but can also be used in more unique ways, such as in soup.
- What do you serve with Pork Carnitas? Side dishes to pork carnitas can include rice, beans, and salads.
More Pork Dinner Recipes to Try

Pork is a great meat to add a variety of different flavors to.
Maple Apple Pork Chops is an easy skillet pork chops recipe that has the most amazing creamy apple brandy sauce.
Ranch Pork Chops and Cuban Pork Tenderloin are also easy dinner recipes with big flavor. I highly recommend all three of these recipes.
Love this Pork Carnitas Slow Cooker recipe? Follow me on Pinterest, Instagram, and Facebook for more!

Slow Cooker Pork Carnitas
Ingredients
- 3-4 pound pork shoulder * also called Boston butt
- 1 onion
- 2 cups vegetable stock * or water
- 4 cloves garlic * minced
- 1 orange
- 1 lime
- 1 jalapeno pepper * halved, optional
- 1 teaspoon salt
- 1/4 teaspoon pepper
- 1 1/2 teaspoons ground cumin
- 1 teaspoon dried oregano
- 2 bay leaves
Instructions
- Cut the onion in half and place it in the bottom of a slow cooker.
- Place the pork roast on top of the onion, fat side up.
- Pour in the vegetable stock or water.
- Cut the orange in half and squeeze the juice over top of the pork, then repeat with the lime. You can add the spent halves to the slow cooker, or discard them.
- Add the garlic and jalapeno to the top of the pork, then sprinkle on the salt, pepper, cumin, and oregano. Lay the two bay leaves on top, as well.
- Cover and cook on low for 8 hours.
- Once meat is done, remove the oranges and limes and discard. You can either remove the onion and jalapeno or shred it and mix it into the pork.
- Shred the pork with two forks. Remove it from the slow cooker with a slotted spoon and place on a baking sheet. Reserve the liquid in the slow cooker.
- Place the baking sheet under the broiler, watching closely, until the pork is lightly browned and the ends start getting crispy, about 5 minutes.
- Remove from the oven, toss with 1/4 to 1/2 cup of the juices from the slow cooker,
and serve, as desired.
Notes
Tips and Techniques for the Best Pork Carnitas
- Add the spent orange and lime halves into the slow cooker with the pork for more flavor, if desired. If you do cook them with the pork, be sure to discard them before shredding the meat.
- It is highly recommended to finish the pork under the broiler for about 5 minutes to crisp it up. However, if you’d rather not, then it’s perfectly okay to use it straight from the slow cooker.
- Store leftovers in an air-tight container in the refrigerator. Use within 3-4 days.
Nutrition
This recipe was originally published on February 1, 2016. It was updated with new images, more thorough instructions, tips, techniques, and FAQ’s in January 2020.