


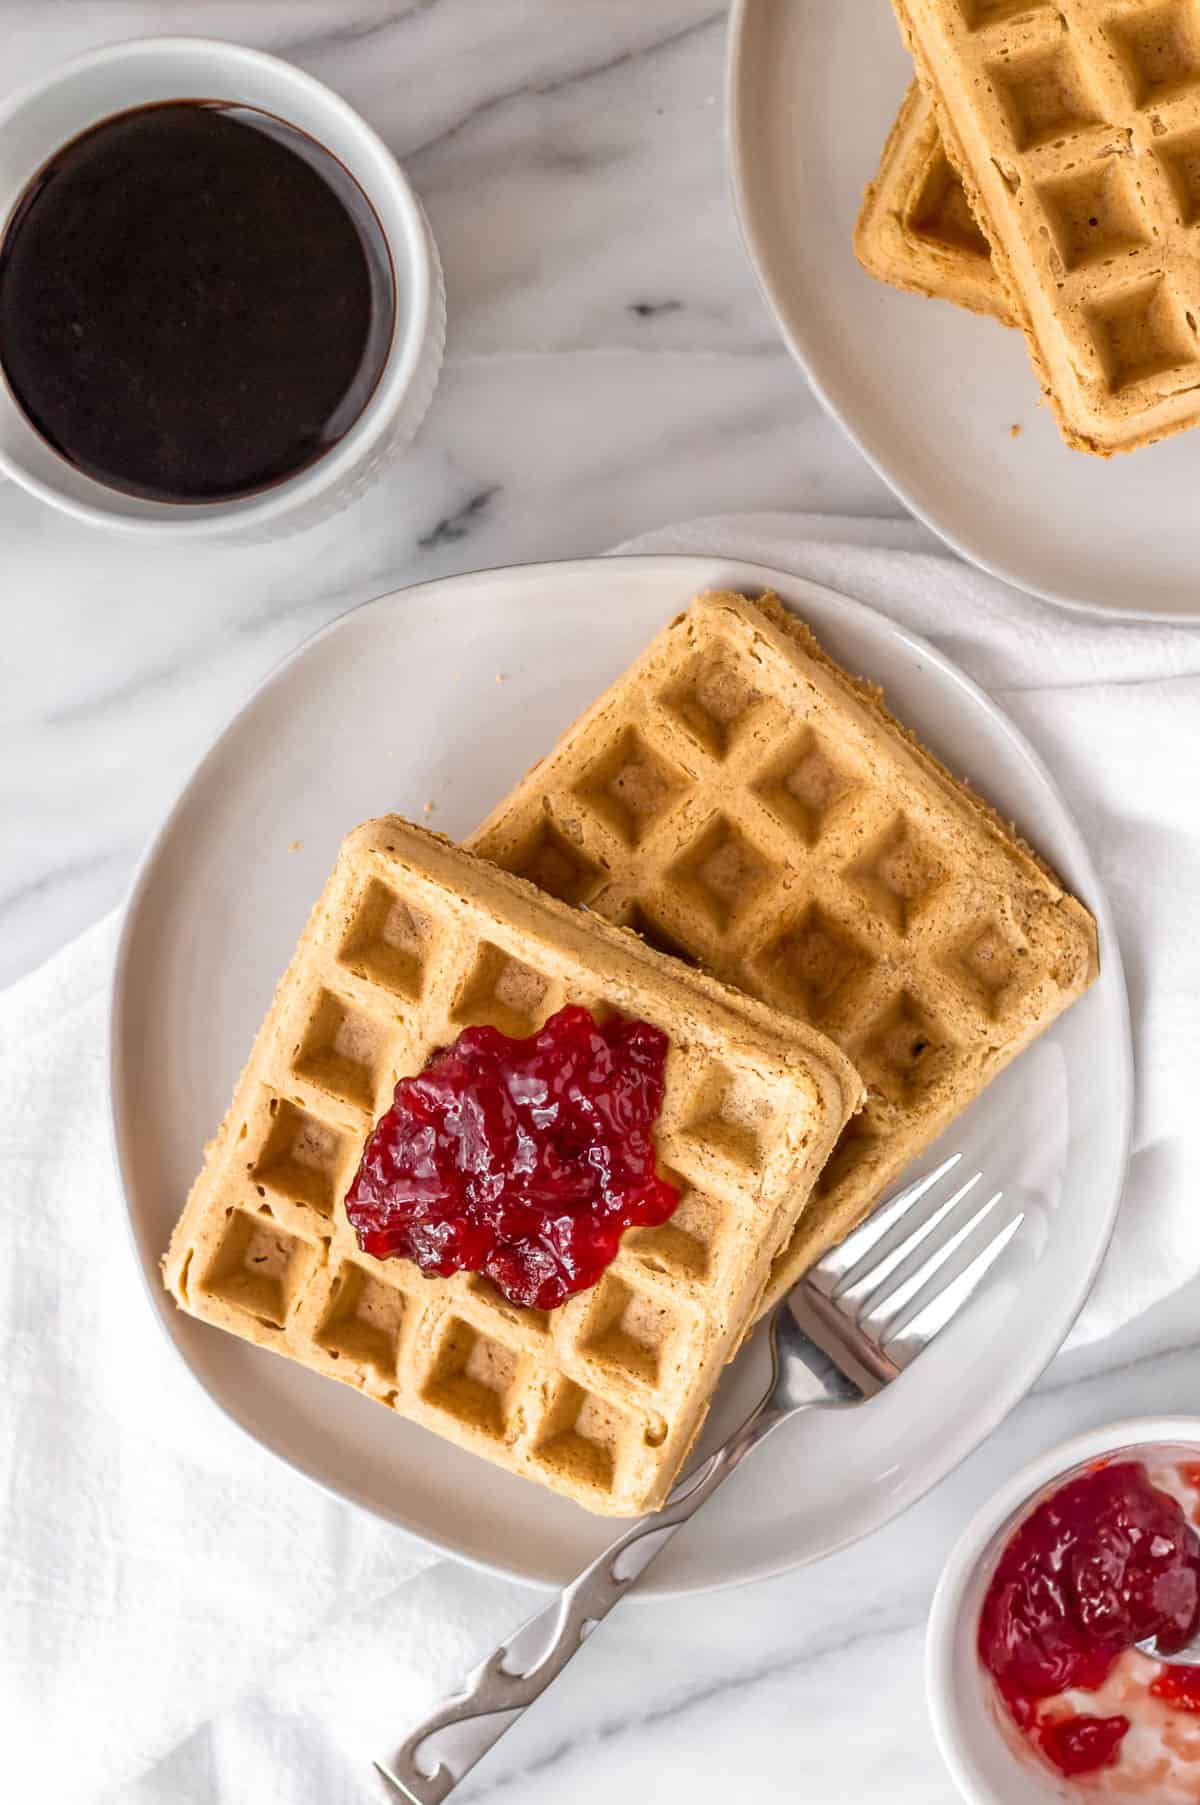
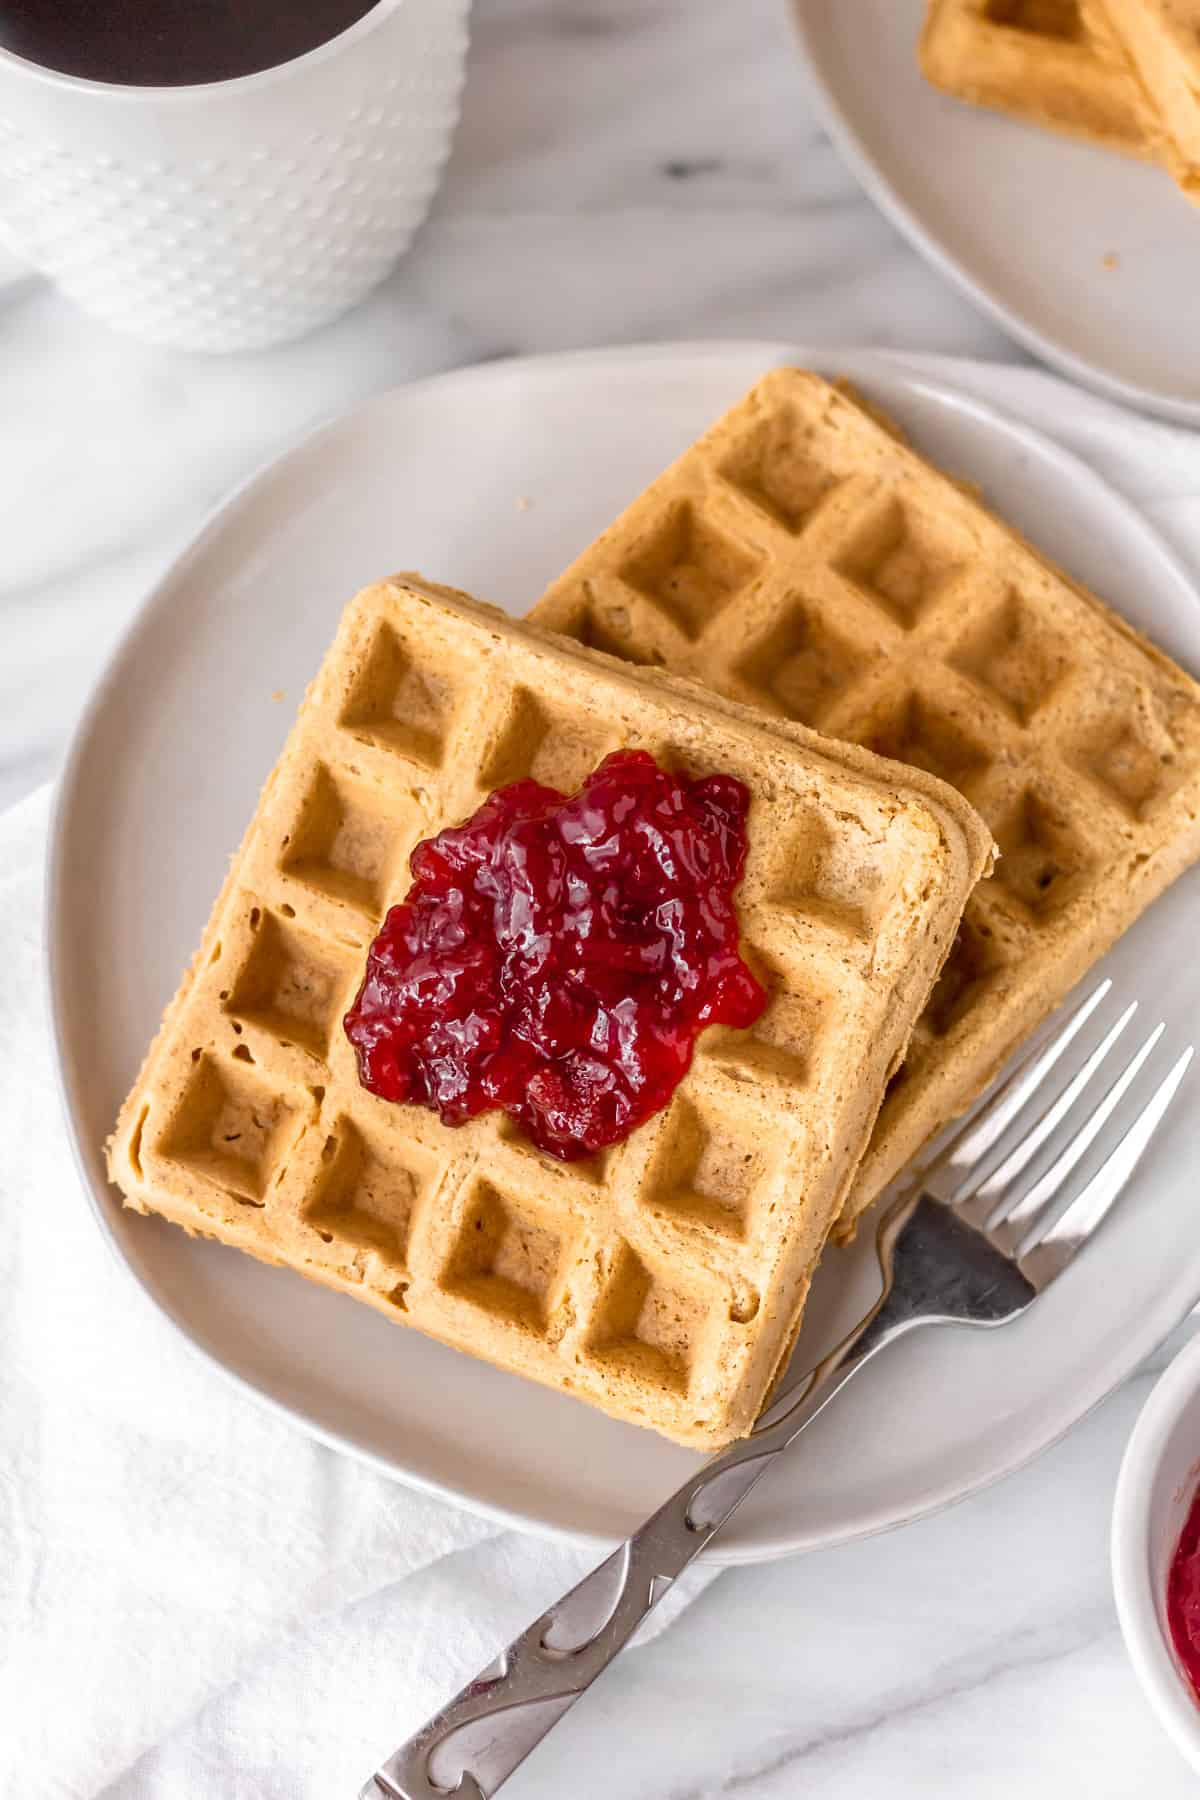
Fans of the classic sandwich will really enjoy this new take! Gluten-free peanut butter and jelly waffles are an allergy-friendly choice for breakfast or brunch.
This post contains affiliate links. See our Disclosure Statement for more information.
There’s a reason waffles are a classic breakfast choice. They are fluffy, with a crispy outside and soft inside. The little squares hold the syrup perfectly. It’s such a polite little breakfast, right?
These peanut butter and jelly waffles taste just like your favorite sandwich! That’s why these gluten-free waffles are so perfect for brunch. They combine the savory flavors of a peanut butter and jelly sandwich with the iconic square breakfast treat.
Plus, these are good for you too. The protein adds more than flavor, it boosts the waffles with extra protein. It’s easy to make gluten-free waffles, just use a combination of tapioca flour and coconut flour.
If you want more healthy waffle recipes, check out how to make flaxseed waffles. They have a delicious nutty flavor.
Why This Recipe Works
Peanut butter and jelly go together like milk and cookies. They are a classic combination that kids love and adults are loyal to. These waffles are super-simple and easy to mix and grill.
The base is a peanut butter waffle that you then top with your favorite jelly. It’s also super-versatile, with a lot of different flavor combinations you could come up with. Don’t like peanut butter (or are allergic)? Use almond butter or even sunflower seed butter. If grape jelly isn’t your favorite, top with apple butter or strawberry jelly.
It’s a kid-friendly recipe that my son actually created when he was younger.
These are also fluffy waffles that have the same amazing texture as traditional waffles. You are going to love them!
Step-By-Step Instructions
Ingredients
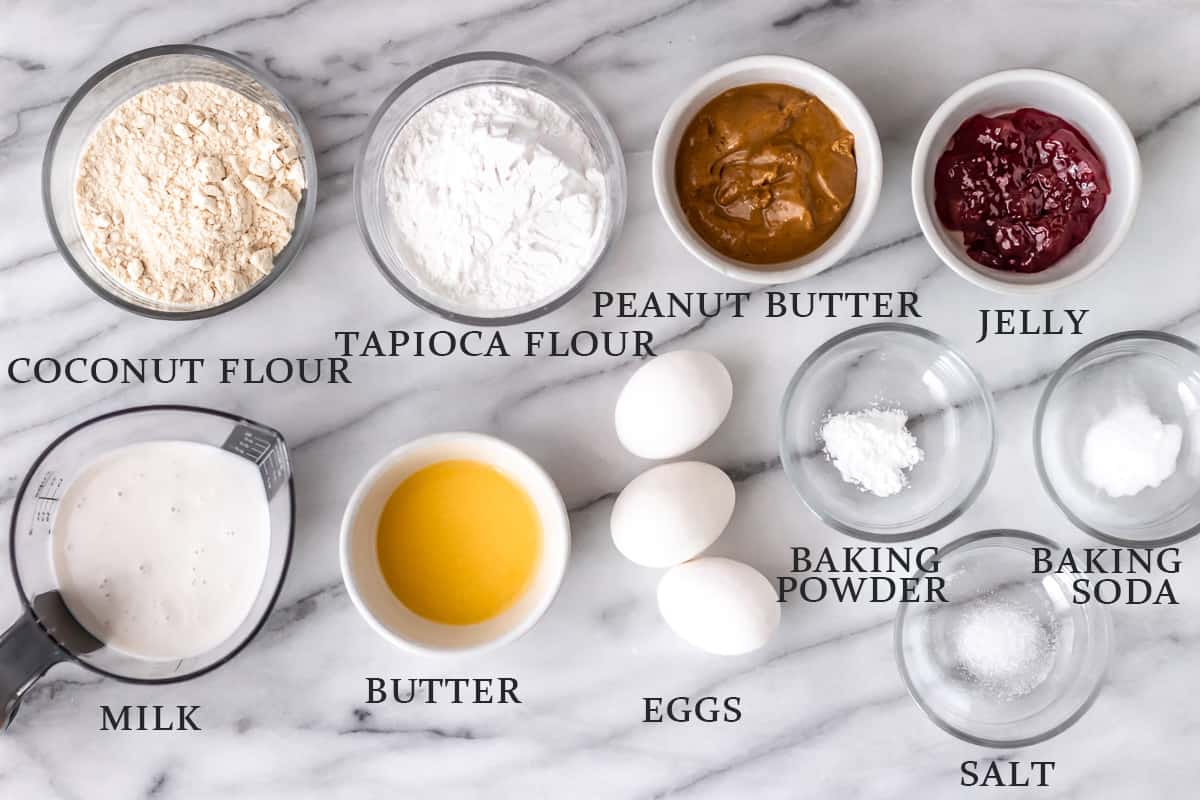
- Tapioca Flour
- Coconut Flour
- Baking Soda
- Baking Powder
- Salt
- Almond Milk: If you aren’t dairy-free, you can use whole milk.
- Eggs
- Butter: Use unsalted butter (dairy free, if needed).
- Creamy Peanut Butter: If you have a peanut allergy, any kind of nut butter can be used instead.
- Jelly (or Jam): any flavor that you like.
The entire recipe and instructions can also be found in the recipe card at the bottom of this post. You can also print the recipe from the card, if needed.
Prep!
Preheat your waffle maker to medium-high, or whichever setting you usually prefer.
Melt the butter and set aside to cool some.
Create!
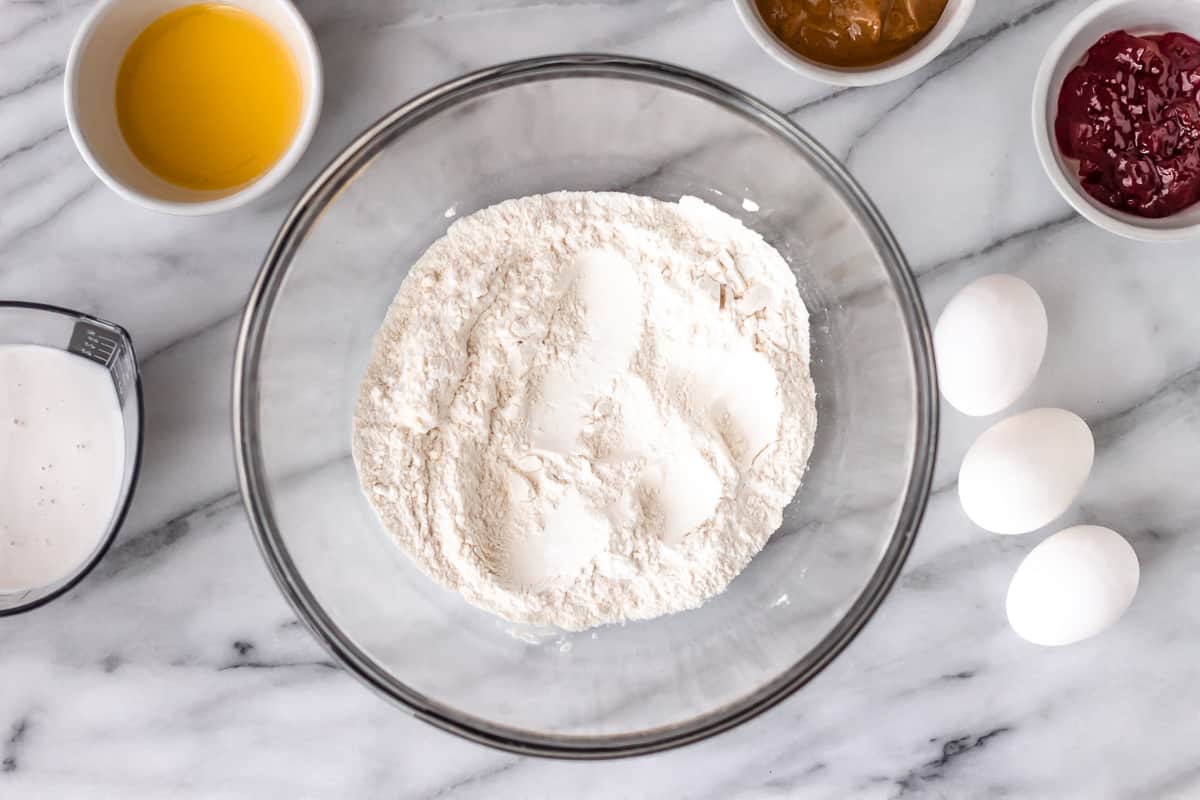
In a medium bowl mix together the tapioca flour, coconut flour, baking soda, baking powder, and salt.
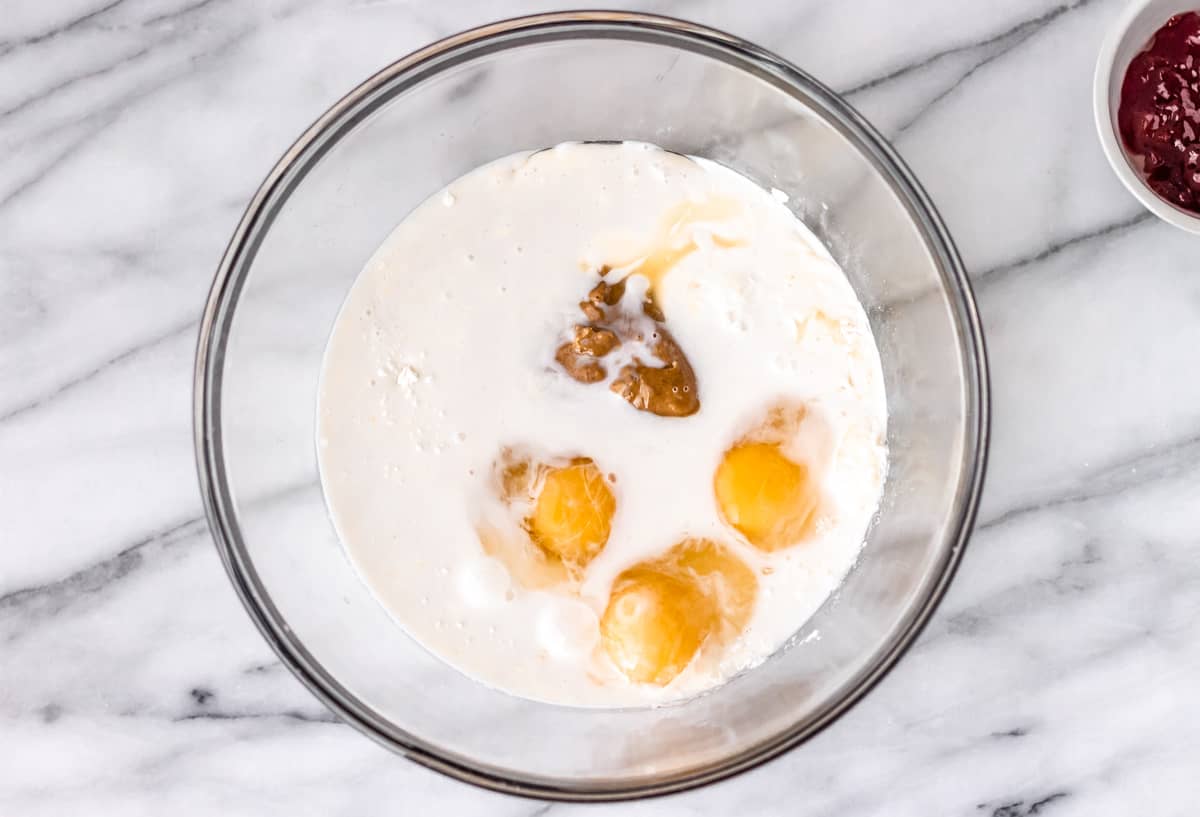
Make a well in the center and add the almond milk, eggs, butter, and peanut butter. Whisk the wet ingredients together, then mix them into the dry until just combined.
Be careful not to over mix the batter.

Pour batter into the preheated waffle iron (working in batches, if necessary).
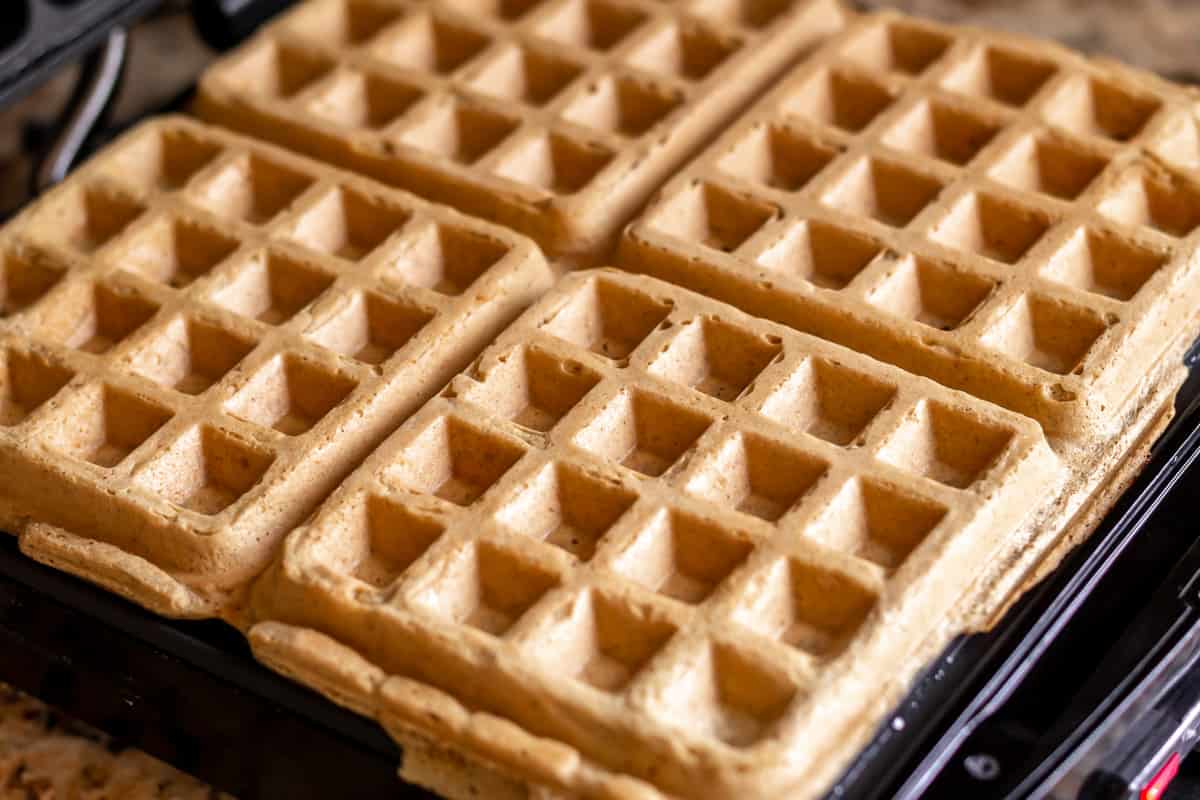
Cook until the waffles are done through and edges are just crispy, about 4 minutes.
Present!
Top each waffle with approximately 1 tablespoon of the jelly (or jam) of your choice.
Tips and Techniques
- While the combination of tapioca and coconut flours give these waffles amazing texture and fluffiness, an all purpose gluten free flour can be used instead.
- Store leftover waffles tightly wrapped in plastic wrap in the refrigerator. Consume within 2-3 days.
- Homemade waffles can also be frozen for up to 3 months. Simply reheat them in your toaster or in an oven preheated to 350°F for about 10 minutes.
FAQ’s
What Do You Top Peanut Butter Waffles With?
Peanut butter waffles pair perfectly with your favorite jelly, but are also equally as delicious with butter and syrup.
Whipped cream and strawberries are classic waffle toppings that taste perfectly with peanut butter.
How Do You Reheat Waffles?
Waffles can be reheated on a sheet pan in the oven at 350°F for 5-10 minutes. They can also be reheated in a toaster. Be sure to keep a close eye on them to prevent burning.
What Makes A Waffle Chewy?
Waffles are less fluffy and more dense or chewy when you over-mix the batter. Don’t mix them with the batter too vigorously. Mix it just well enough to incorporate the ingredients together completely. Then, let it sit for a few minutes to allow the chemical reactions to happen within the batter (which gives it that fluffy texture you love!).
More Breakfast Recipes


Love this Gluten Free Peanut Butter and Jelly Waffles recipe? Follow me on Pinterest, Instagram, and Facebook for more!
If you try this recipe, I would really appreciate it if you would please leave a comment and star rating. Thanks!

Gluten Free Peanut Butter & Jelly Waffles
Ingredients
- 1/2 cup tapioca flour
- 1/2 cup coconut flour
- 1/2 teaspoon baking soda
- 1/2 teaspoon baking powder
- 1/4 teaspoon salt
- 1 cup almond milk (I used unsweetened, can use dairy milk)
- 3 eggs (lightly beaten)
- 2 tablespoons butter (melted and cooled)
- 1/2 cup creamy peanut butter
- 1/4 cup jelly (or jam, any flavor you like)
Instructions
- Preheat your waffle maker to medium-high or the setting that you typically prefer.
- In a medium bowl mix together the tapioca flour, coconut flour, baking soda, baking powder, and salt.1/2 cup tapioca flour, 1/2 cup coconut flour, 1/2 teaspoon baking soda, 1/2 teaspoon baking powder, 1/4 teaspoon salt
- Make a well in the center and add the almond milk, eggs, butter, and peanut butter. Whisk the wet ingredients together, then mix them into the dry until just combined. Be careful not to over mix the batter.1 cup almond milk, 3 eggs, 2 tablespoons butter, 1/2 cup creamy peanut butter
- Pour batter into the preheated waffle iron (working in batches, if necessary). Cook until the waffles are done through and edges are just crispy, about 4 minutes.
- Top each waffle with approximately 1 tablespoon of the jelly (or jam) of your choice.1/4 cup jelly
Notes
Tips and Techniques
- While the combination of tapioca and coconut flours give these waffles amazing texture and fluffiness, an all purpose gluten free flour can be used instead.
- Store leftover waffles tightly wrapped in plastic wrap in the refrigerator. Consume within 2-3 days.
- Homemade waffles can also be frozen for up to 3 months. Simply reheat them in your toaster or in an oven preheated to 350°F for about 10 minutes.
Nutrition
This recipe was originally published on January 4, 2017. It was updated with an improved recipe, new images, step-by-step instructions, tips, techniques and FAQ’s in September 2022.