

Homemade paneer cheese is one of the easiest cheeses to make. You only need 2 ingredients and a few basic supplies to make your own round of this simple, delicious cheese.
This post contains affiliate links. See our Disclosure Statement for more information.
Paneer cheese is sometimes confused with tofu, but they are completely different foods.
Paneer is made with just two ingredients, milk and an acid like white vinegar. This is a great cheese to make when first learning cheesemaking.
The acid is used to quickly separate the curds (solids) and whey (liquid) in the milk. The curds are then drained and pressed into one solid mass to create cheese.
Paneer is a very mild cheese and can be snacked on alone, with dips or used in a variety of dishes.
It’s often used in vegetarian Indian cuisines as a substitute for meats. Butter Paneer and Paneer Pakora are a couple examples of recipes that use paneer. You can also add it to salad and sandwiches.
Why This Recipe Works
Paneer is a very easy recipe to make and requires just two ingredients – milk and an acid like white vinegar.
It’s a versatile ingredient that can be used as a meat substitute, fried similar to halloumi cheese, added to salad, or enjoyed on its own with or without a dip or chutney.
It’s actually less expensive to make your own homemade paneer than it is to buy it.
How To Make Paneer
Ingredients
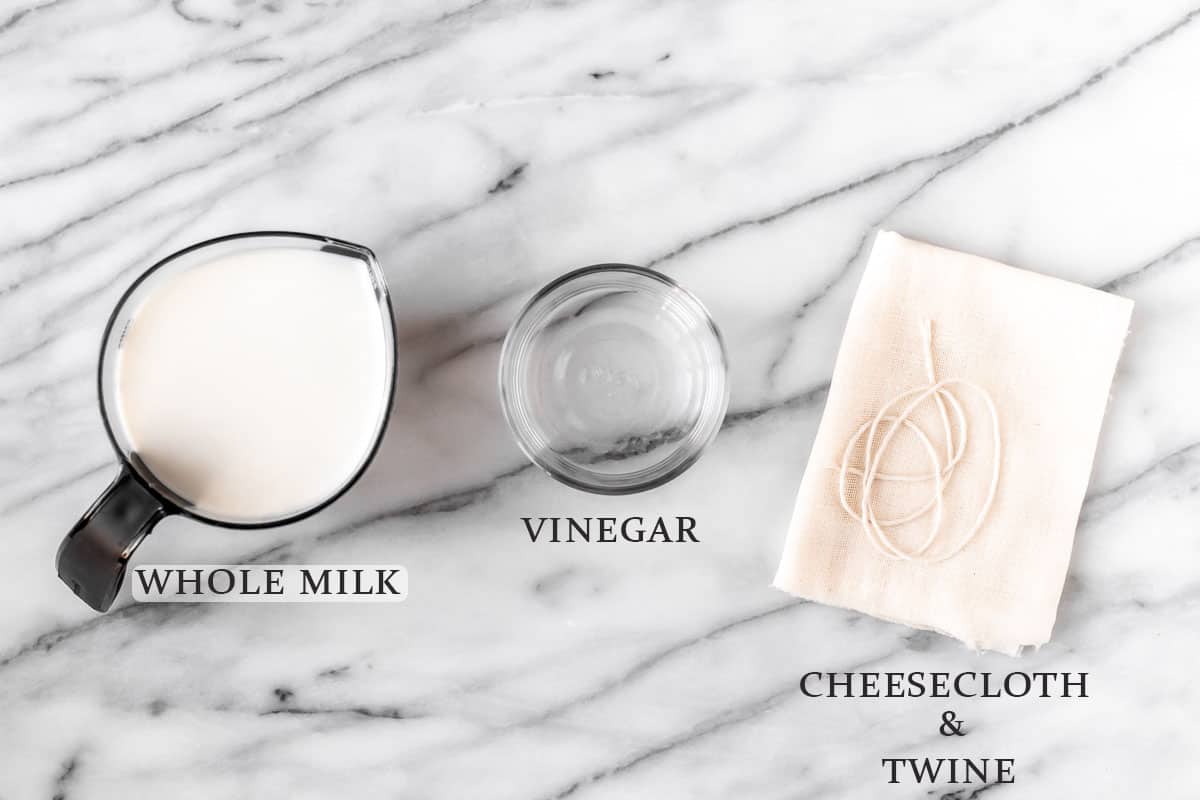
- 6 cups whole milk
- 2-3 tablespoons white vinegar (lemon juice can also be used)
You will also need:
- Sieve (and a bowl if planning to keep the whey)
- Cheesecloth
- Kitchen twine
- Cutting board
- Heavy objects to press the cheese like a cast iron pan, bags of rice, canned good etc.
The entire recipe and instructions can also be found in the recipe card at the bottom of this post. You can also print the recipe from the card, if needed.
Prep!
Line your strainer with a layer or two of cheesecloth and a cut a piece of kitchen twine about 12-inches long.
Create!
Add the milk to a saucepan and turn the heat onto medium. Allow the milk to come to a simmer. The milk should be very hot and starting to bubble around the edges, but not boiling.
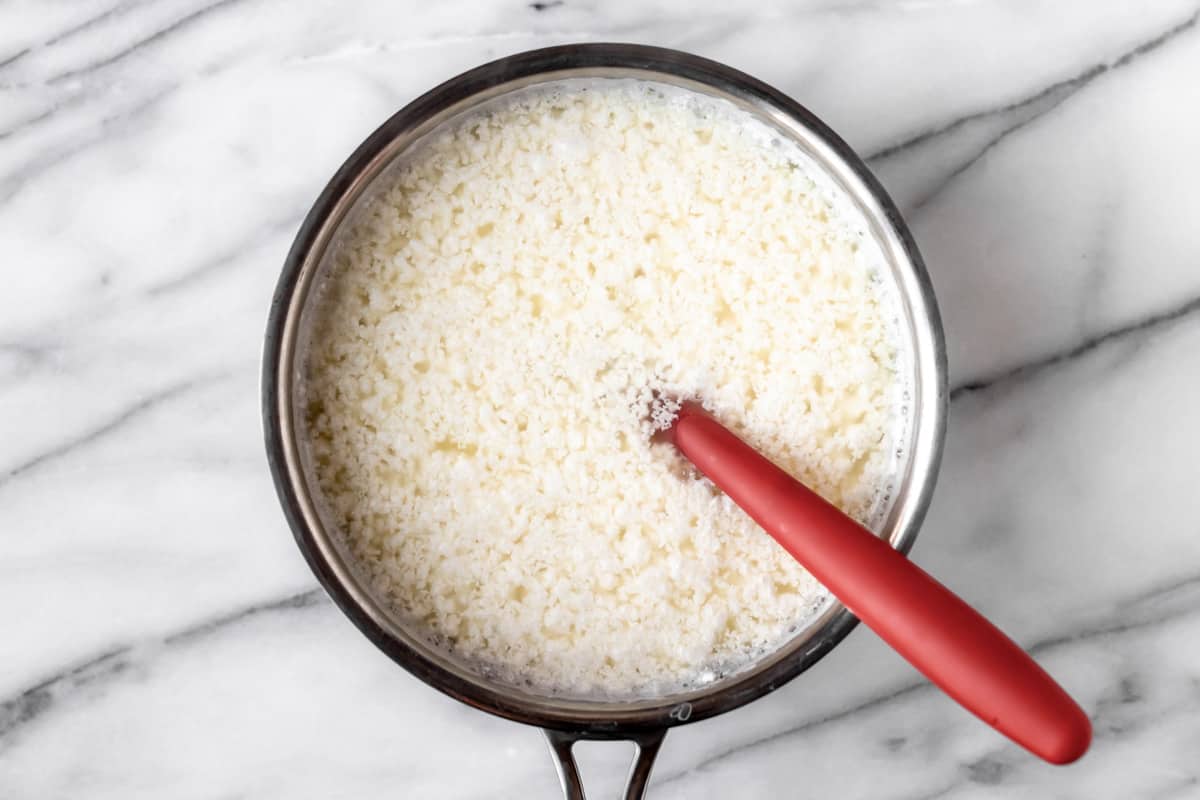
Turn the heat off and add two tablespoons of vinegar. Stir until the curds separate from the whey. The liquid part is they whey and should be a very light yellowish color once all the curds separate. The curds will be white and will look similar to cottage cheese at this point.
If the liquid is still milky, slowly add the third tablespoon of vinegar until the desired results are reached.
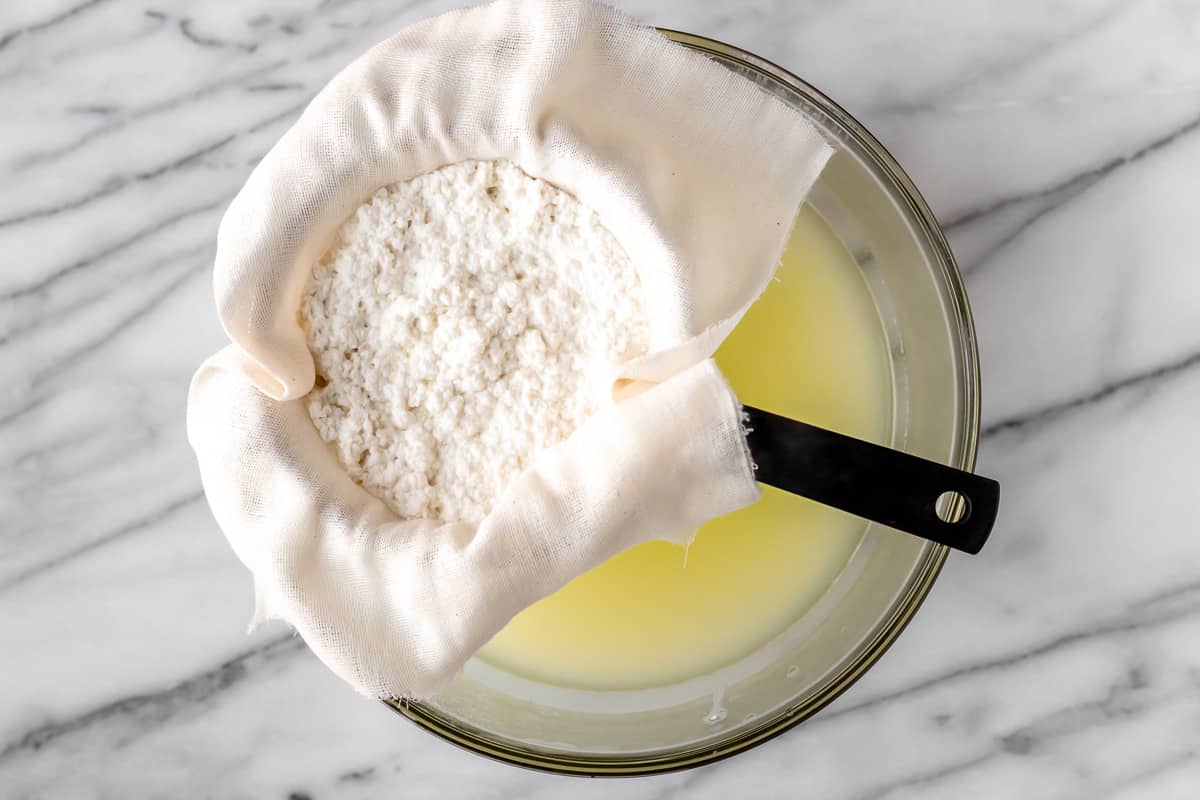
Strain the mixture through the cheesecloth lined sieve. The whey can be kept for other purposes, if desired, or discarded.
Rinse the curds with cold water to cool them and remove any residual vinegar.
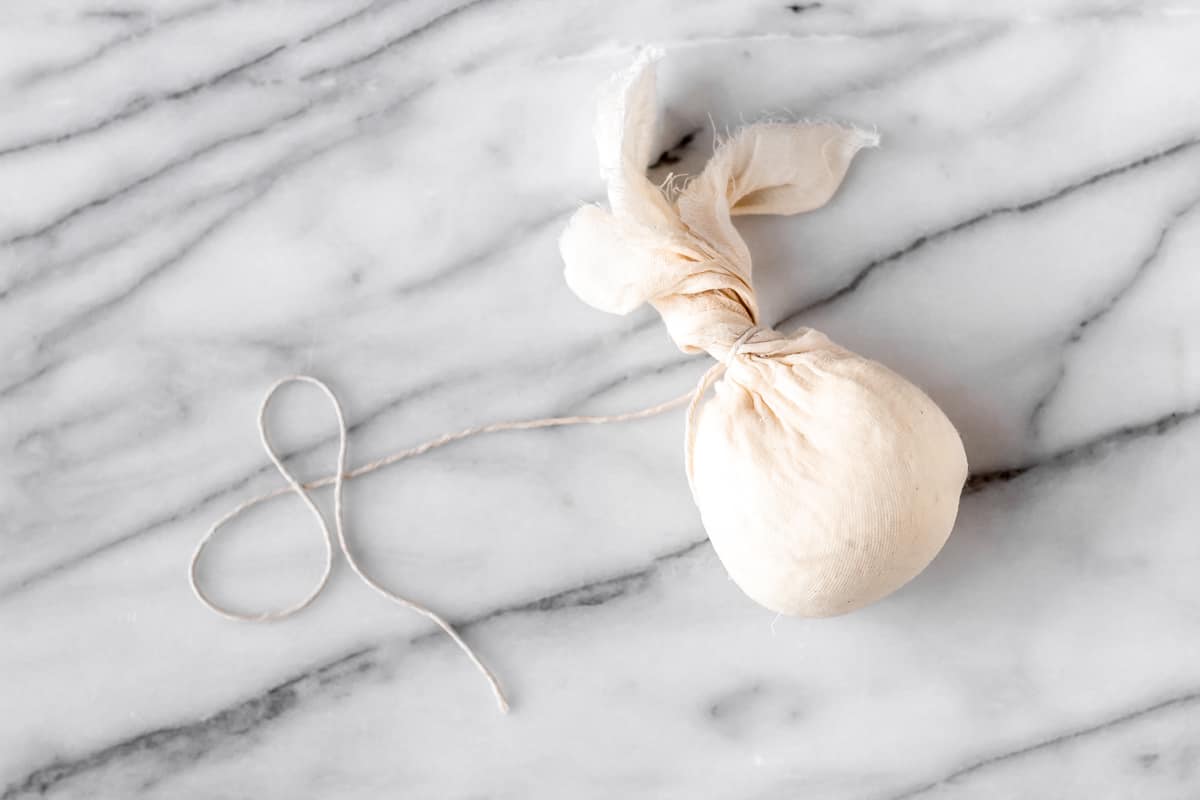
Wrap the curds up tightly in the cheesecloth and squeeze tightly to remove as much liquid as possible. Tie the cheesecloth tightly closed with one end of the twine.
At this point you can hang the ball of curds over a bowl by tying it to a spoon and laying the spoon over the bowl. Or you can simply let it rest in a bowl. After 30 minutes, squeeze any remaining liquid out.
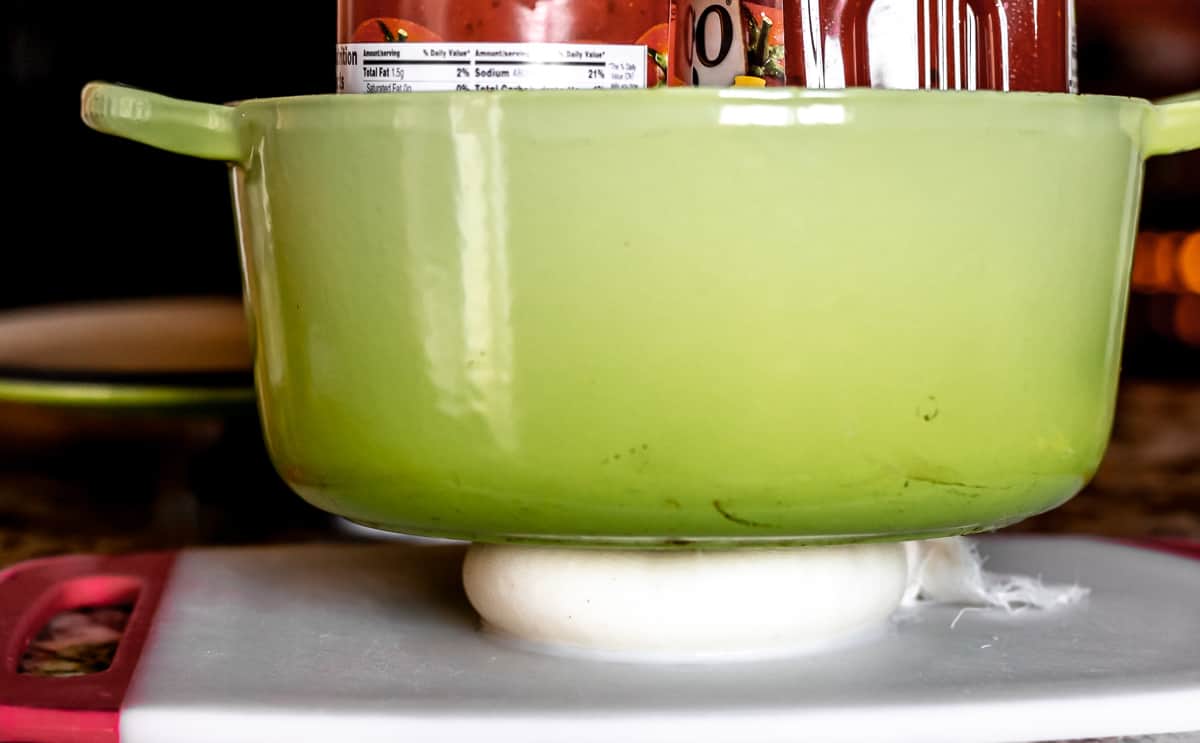
Transfer the ball to a cutting board. I prefer to untie the ball, but keep the cheesecloth twisted tight. Place a cast iron pan or baking sheet over the ball. Add canned goods or heavy bags of rice or beans to the pan or baking sheet to add weight. This process presses the cheese curds together to form a solid mass.
You can leave the paneer at room temperature or transfer to the refrigerator. Leave 2-3 hours.
After 2-3 hours, remove the weights and cheesecloth.
Present!
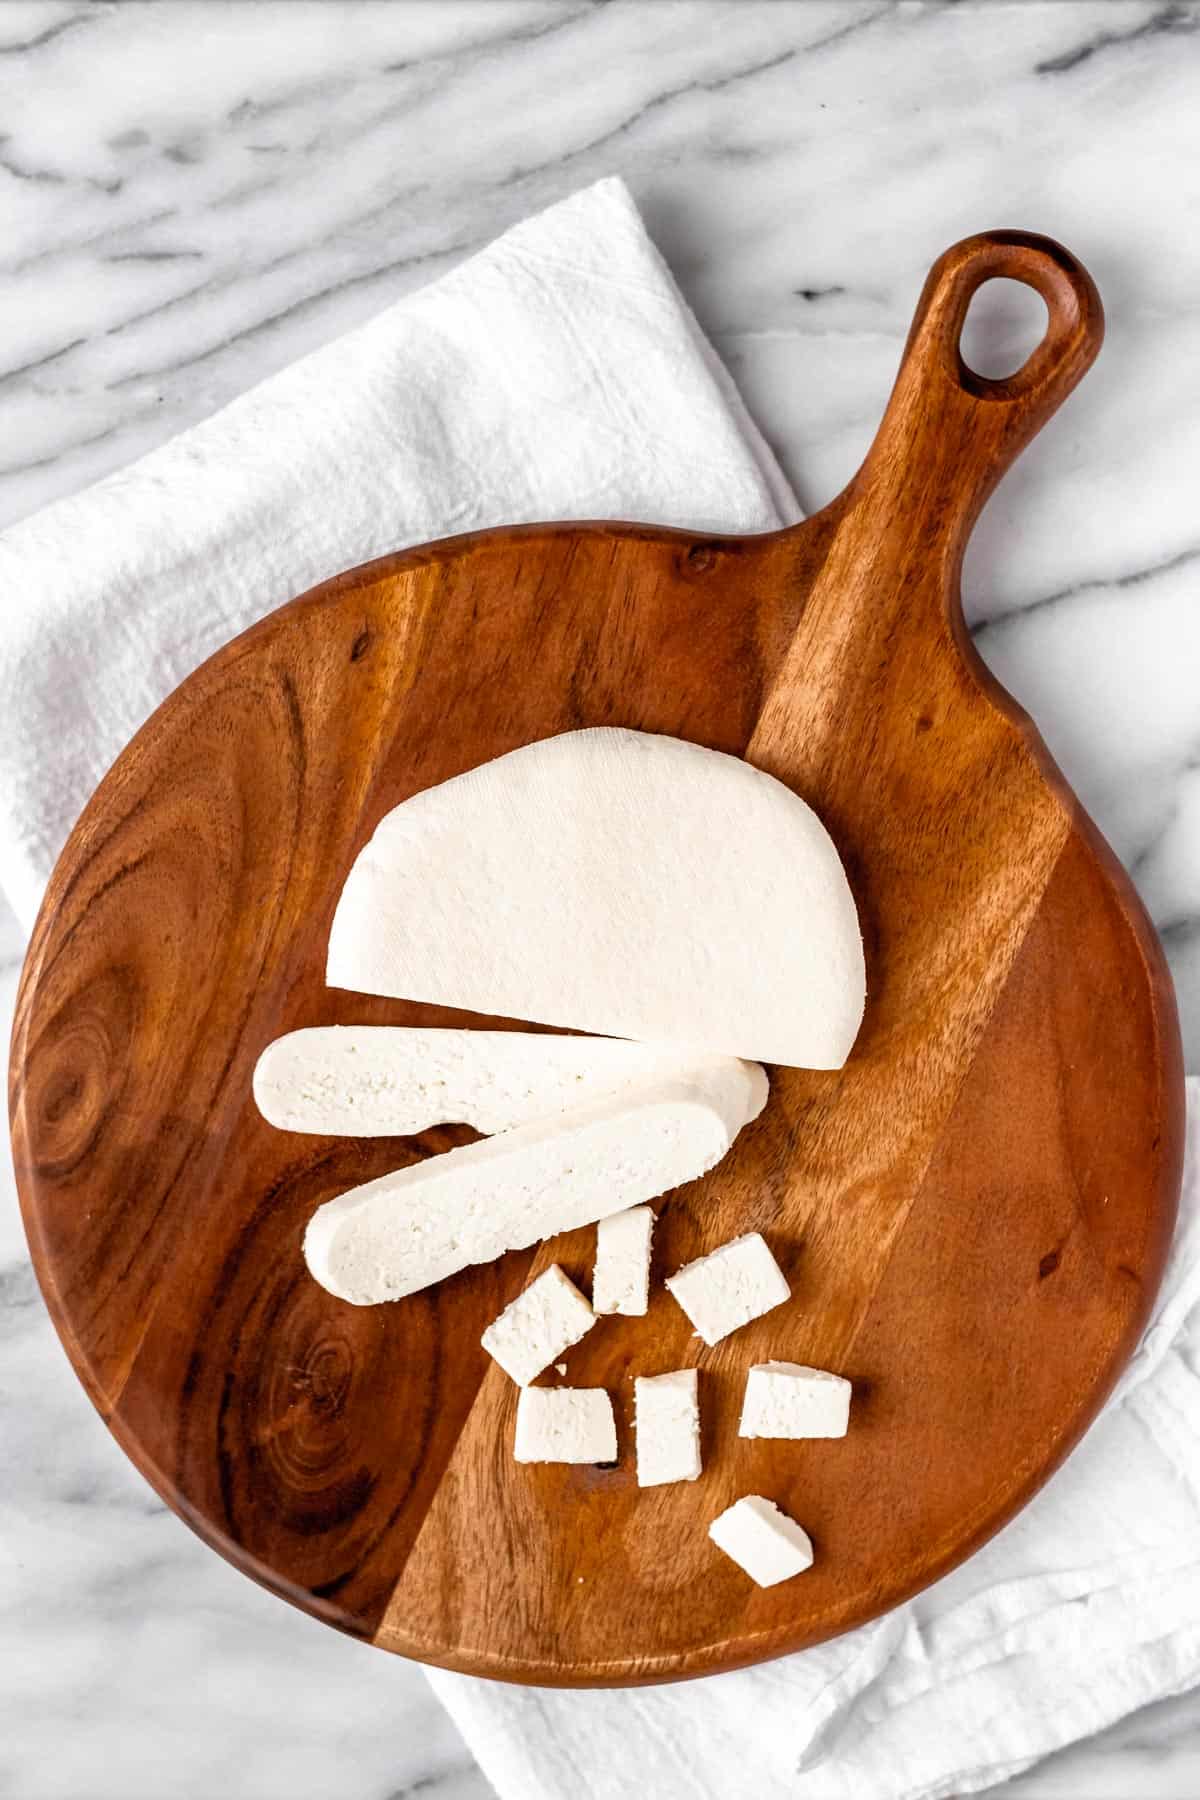
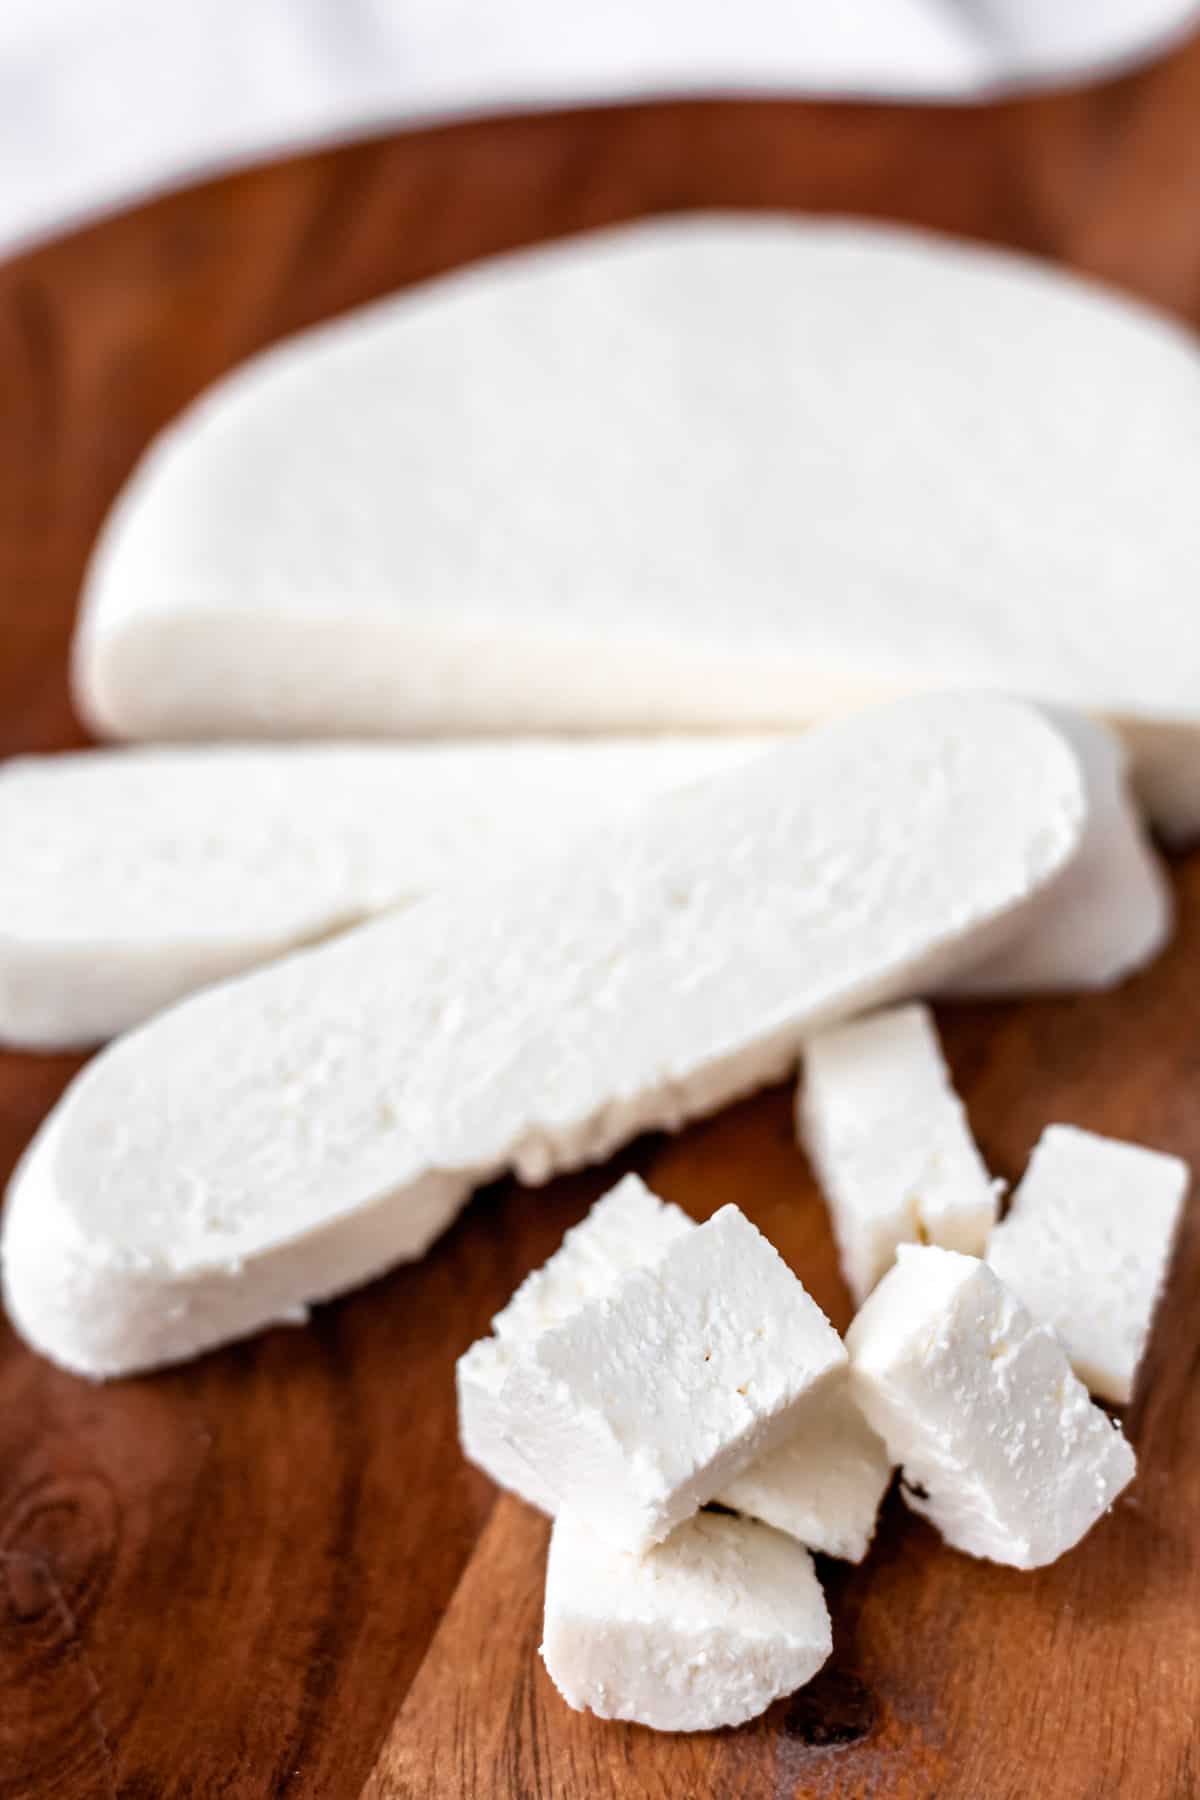
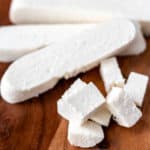
You can now cut it and use it as desired, or store it in the refrigerator until needed.
Chef’s Tip: paneer should be chilled prior to use to help it firm up. If you press it at room temperature, chill it for at least an hour or two before using.
Tips and Techniques
- If the curds don’t separate with 2 tablespoons of vinegar, add the third slowly.
- You can use any type of acid to separate the curds from the whey, but white vinegar imparts the least amount of flavor and color and works very well. Lemon juice is also commonly used. If neither of these are available, you can use a different vinegar, but may have slightly different results.
- Store paneer in an airtight container in the refrigerator for up to 2-3 days or freeze for up to 2 months.
FAQ’s
How Long Can You Store Homemade Paneer In The Refrigerator?
Homemade paneer can be stored in the refrigerator for 2-3 days.
Can You Freeze Paneer?
Yes, paneer can be frozen for up to 2 months.
Is Tofu The Same As Paneer?
Though the two are often compared, made in a similar fashion, and sometimes used interchangeably in recipes, they are not the same. Tofu is made from soy milk and is a bean curd, while paneer is a fresh cheese made from cows milk.
More How-To Recipes

Love this Homemade Paneer recipe? Follow me on Pinterest, Instagram, and Facebook for more!
If you try this recipe, I would really appreciate it if you would please leave a comment and star rating. Thanks
Paneer
Equipment Needed
Ingredients
- 6 cups whole milk
- 2-3 tablespoons white vinegar (or lemon juice, see notes)
Instructions
- Line your strainer with a layer or two of cheesecloth and set aside.
- Add the milk to a saucepan and turn the heat onto medium. Allow the milk to come to a simmer. The milk should be very hot and starting to bubble around the edges, but not boiling.6 cups whole milk
- Turn the heat off and add two tablespoons of vinegar. Stir until the curds separate from the whey. The liquid part is they whey and should be a very light yellowish color once all the curds separate. The curds will be white and will look similar to cottage cheese at this point.2-3 tablespoons white vinegar
- If the liquid is still milky, slowly add the third tablespoon of vinegar until the desired results are reached.
- Strain the mixture through the cheesecloth lined sieve. If you plan to keep the whey (liquid) for other uses, strain over a bowl, otherwise is can be discarded.
- Rinse the curds with cold water to cool them and remove any residual vinegar.
- Wrap the curds up tightly in the cheesecloth and squeeze tightly to remove as much liquid as possible. Tie the cheesecloth tightly closed with one end of the twine.
- At this point you can hang the ball of curds over a bowl by tying it to a spoon and laying the spoon over the bowl. Or you can simply let it rest in a bowl. After 30 minutes, squeeze any remaining liquid out.
- Transfer the ball to a cutting board. I prefer to untie the ball, but keep the cheesecloth twisted tight. Place a cast iron pan or baking sheet over the ball. Add canned goods or heavy bags of rice or beans to the pan or baking sheet to add weight. This process presses the cheese curds together to form a solid mass.
- Leave untouched for 2-3 hours. It can stay out at room temperature or you can move it to the refrigerator.
- Once the paneer is formed, remove the weights and cheesecloth.
- You can now cut it and use it as desired, or store it in the refrigerator until needed. Paneer should be chilled prior to using.
Notes
Tips and Techniques
- If the curds don’t separate with 2 tablespoons of vinegar, add the third slowly.
- You can use any type of acid to separate the curds from the whey, but white vinegar imparts the least amount of flavor and color and works very well. Lemon juice is also commonly used. If neither of these are available, you can use a different vinegar, but may have slightly different results.
- Store paneer in an airtight container in the refrigerator for up to 2-3 days or freeze for up to 2 months.