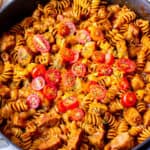
If you love Jalapeño Poppers, you will definitely love this creamy Jalapeño Popper Chicken Pasta recipe. By adding chicken and pasta into a spicy, cheesy sauce, the appetizer favorite now becomes a complete meal.
This post contains affiliate links. See our Disclosure Statement for more information.
If you are a fan of bacon-wrapped Jalapeño Poppers, you will absolutely love this recipe for Jalapeño Popper Chicken Pasta.
It’s like a spicy mac and cheese comfort food recipe with a twist.
By adding chicken, pasta, bacon and plenty of cheese, the whole dish is very hearty and very filling, but the jalapeño popper flavor really shines through.
Why This Recipe Works
This recipe is loaded with incredible cheesy, spicy, smoky, bacon-y flavor.
You can control the amount of spiciness by leaving some, all or none of the jalapeño seeds and membrane in.
You can also make some simple swaps to make this recipe suitable for a low carb or gluten free diet. See the notes section of the recipe card at the bottom of this post for instructions on how to modify the recipe, as needed.
Step-By-Step Instructions
Ingredients
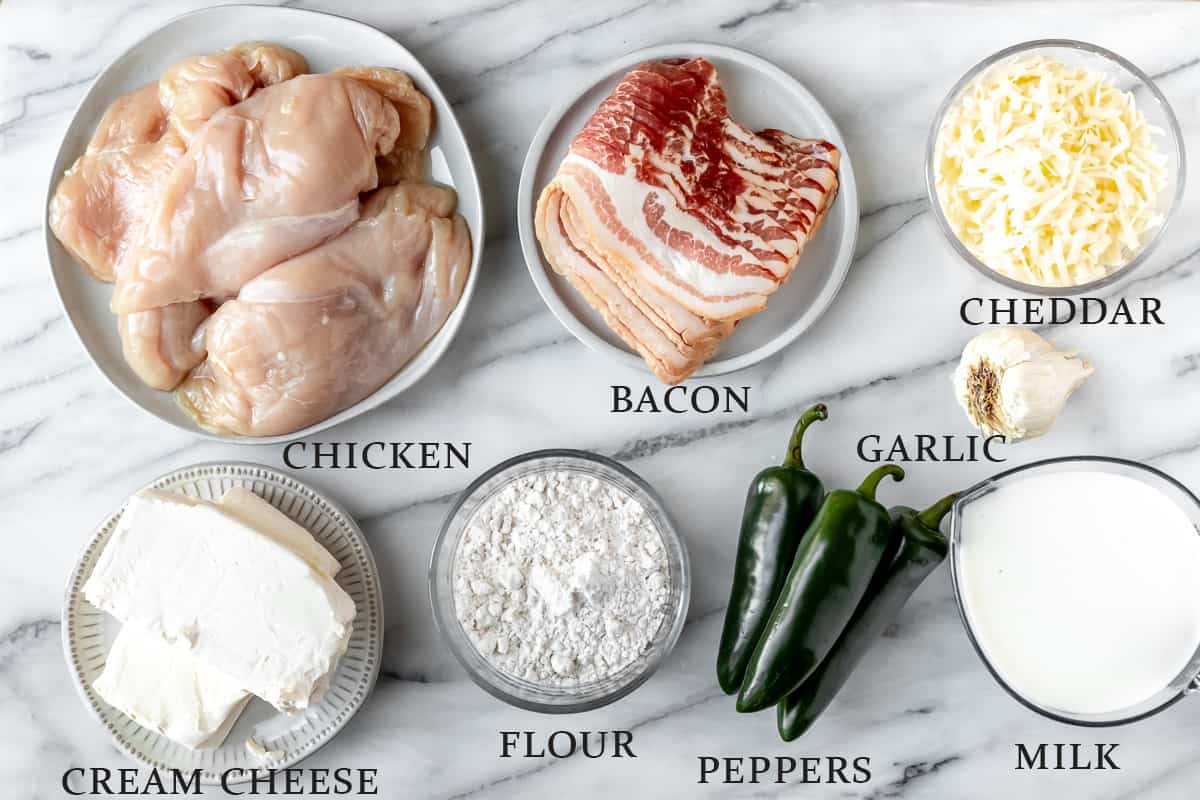
- 1 pound pasta: you can use any shape that you like.
- 12 ounces bacon (diced)
- 1 1/2 pounds boneless, skinless chicken breasts: use small or thin cut chicken.
- salt
- pepper
- 1/2 cup all purpose flour: this is optional. You can pan sear the chicken without dredging it, if you prefer.
- 5 jalapeño peppers (4 diced, 1 sliced thin)
- 2 cloves garlic (minced)
- 16 ounces cream cheese (cut into 1 inch chunks)
- 2 cups whole milk
- 1 cup sharp cheddar cheese (shredded)
The entire recipe and instructions can also be found in the recipe card at the bottom of this post. You can also print the recipe from the card, if needed.
Prep!
There is a little prep work for this recipe, but it will make the cooking process so much easier.
Dice the bacon.
Chef’sTip: it’s easier to dice the bacon by stacking it on top of each other before slicing it.
Dice and slice the jalapeños, mince the garlic, and shred the cheese.
Chef’s Tip: it is always recommended to shred the cheese from a block for the best texture. Pre-shredded cheese can make the sauce grainy due to the added starches in it.
Create!
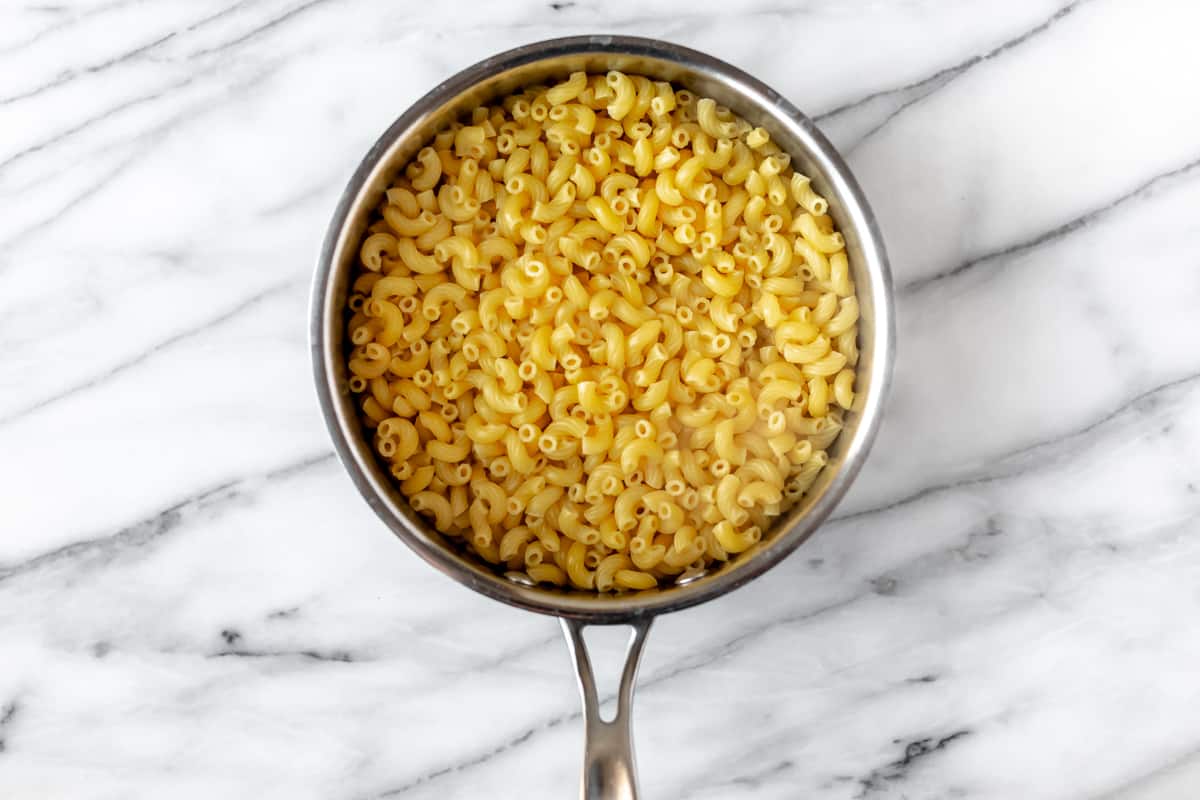
Start a large pot of salted water to boil and cook the pasta according to the directions on the package. Drain and set aside until the sauce is done.
Meanwhile, begin preparing the chicken and sauce.
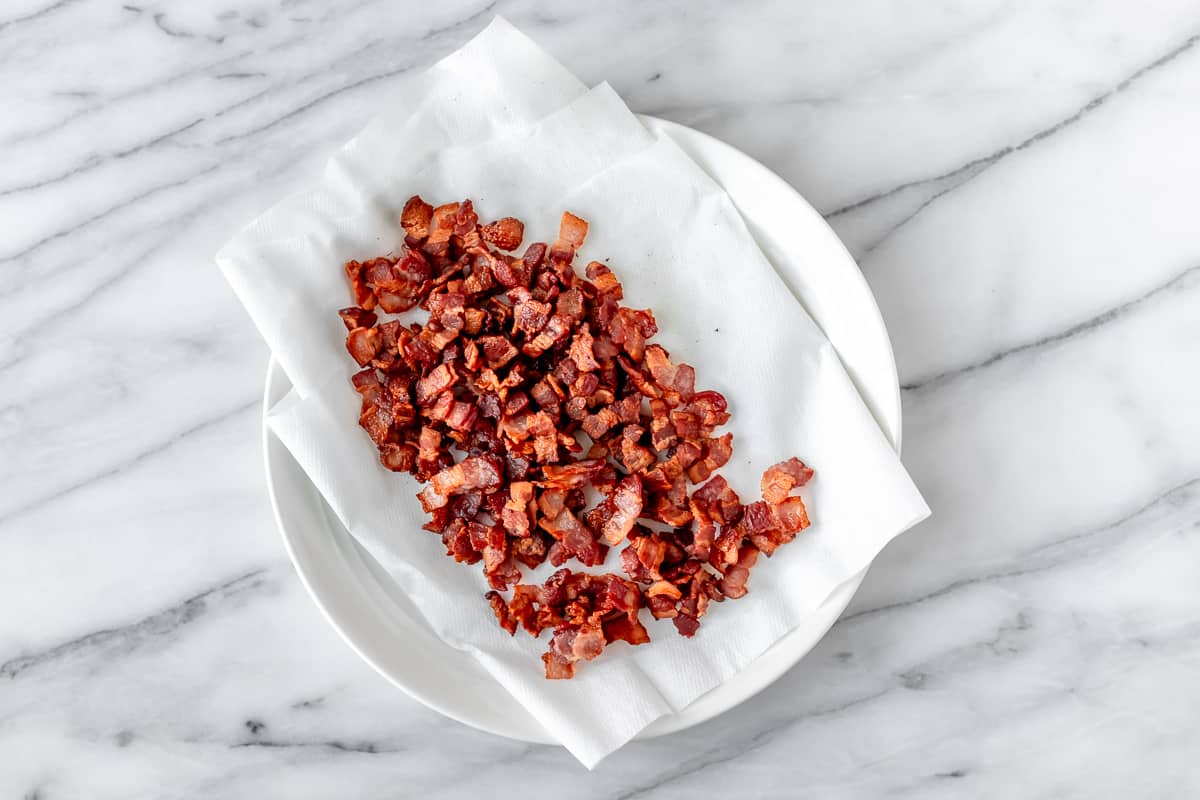
Heat a large, deep skillet over medium heat and add the bacon.
Cook until just crisp, about 7-10 minutes. Remove with a slotted spoon to a paper towel lined plate and set aside.
Return the skillet to medium-high heat.
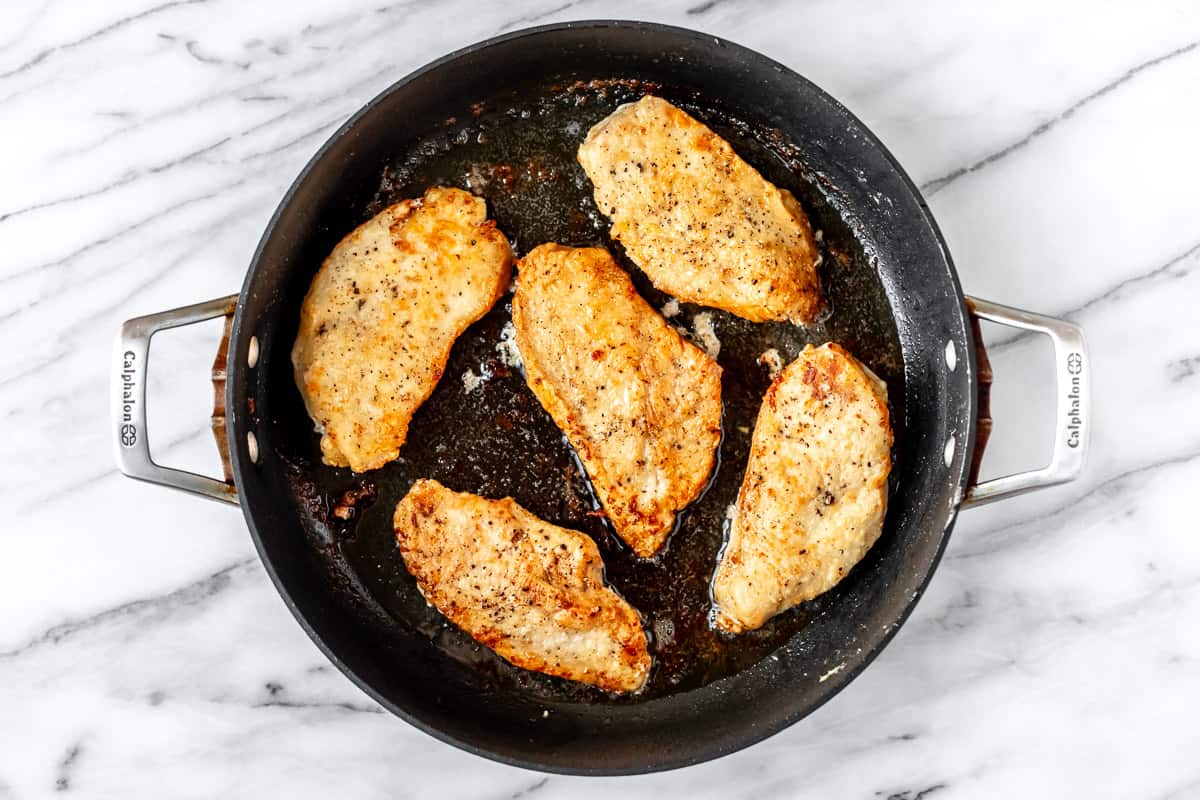
Season the chicken with salt and pepper and dredge both sides in the flour to lightly coat, shaking off any excess flour.
Cook in the bacon grease for approximately 4-6 minutes per side, or until done through and no longer pink in the center. The internal temperature of chicken needs to reach 165ºF on a meat thermometer inserted into the center of the thickest portion.
Remove to the plate, tent with foil to keep warm and set aside.

Drain all but about 1 teaspoon of the bacon grease out of the pan.
Add the diced jalapeño pepper and cook, stirring often, until the peppers are tender and starting to char.
Stir in the garlic and cook another 30 seconds.
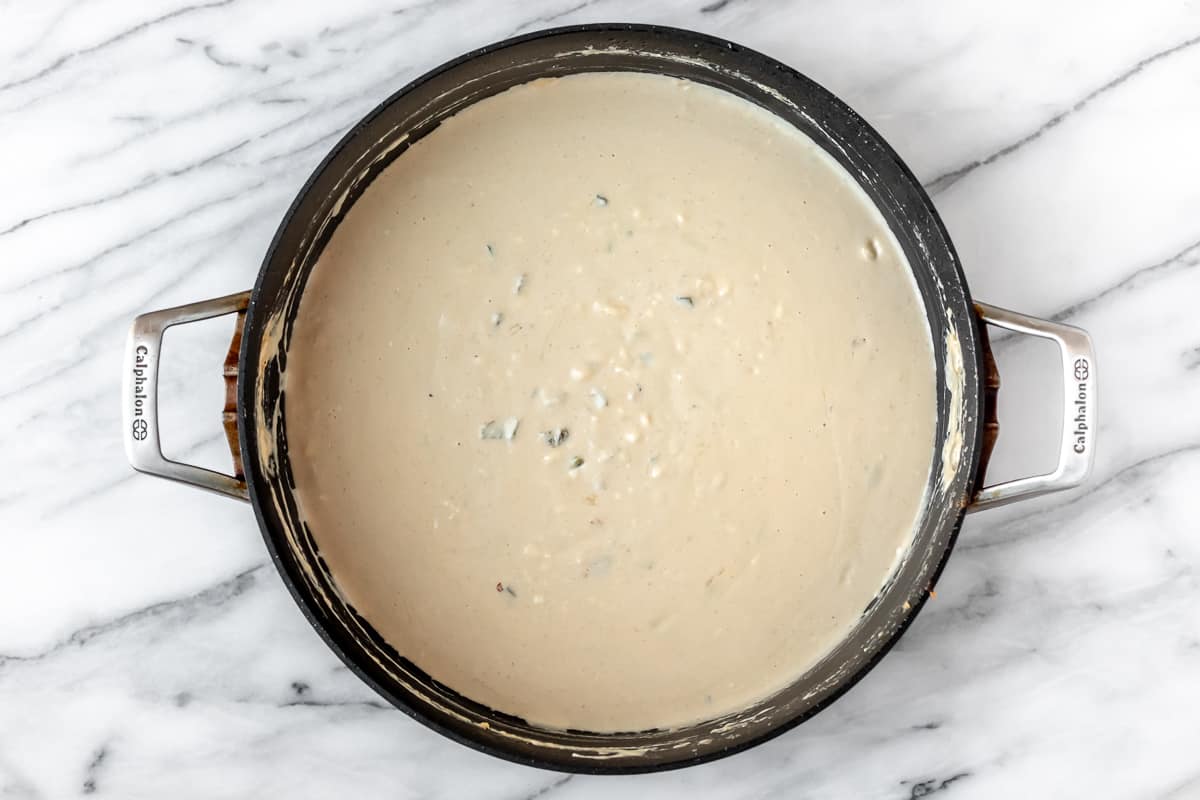
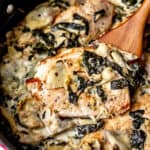
Add the cream cheese and milk and cook, stirring, until smooth and creamy, about 5 minutes.
Remove the pan from the heat and stir in the shredded cheddar cheese until melted and well combined.
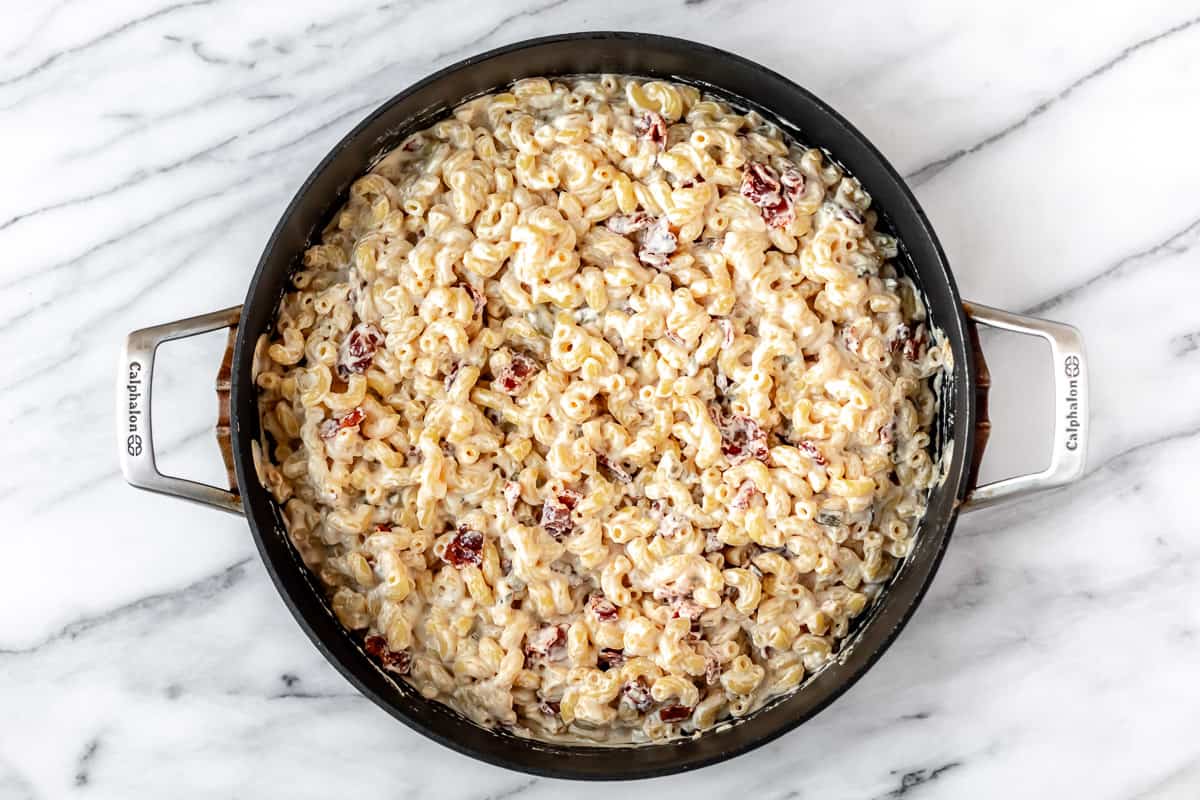
Once the cheese is all melted, add about 3/4ths of the bacon.
Stir the pasta into the sauce.
Present!
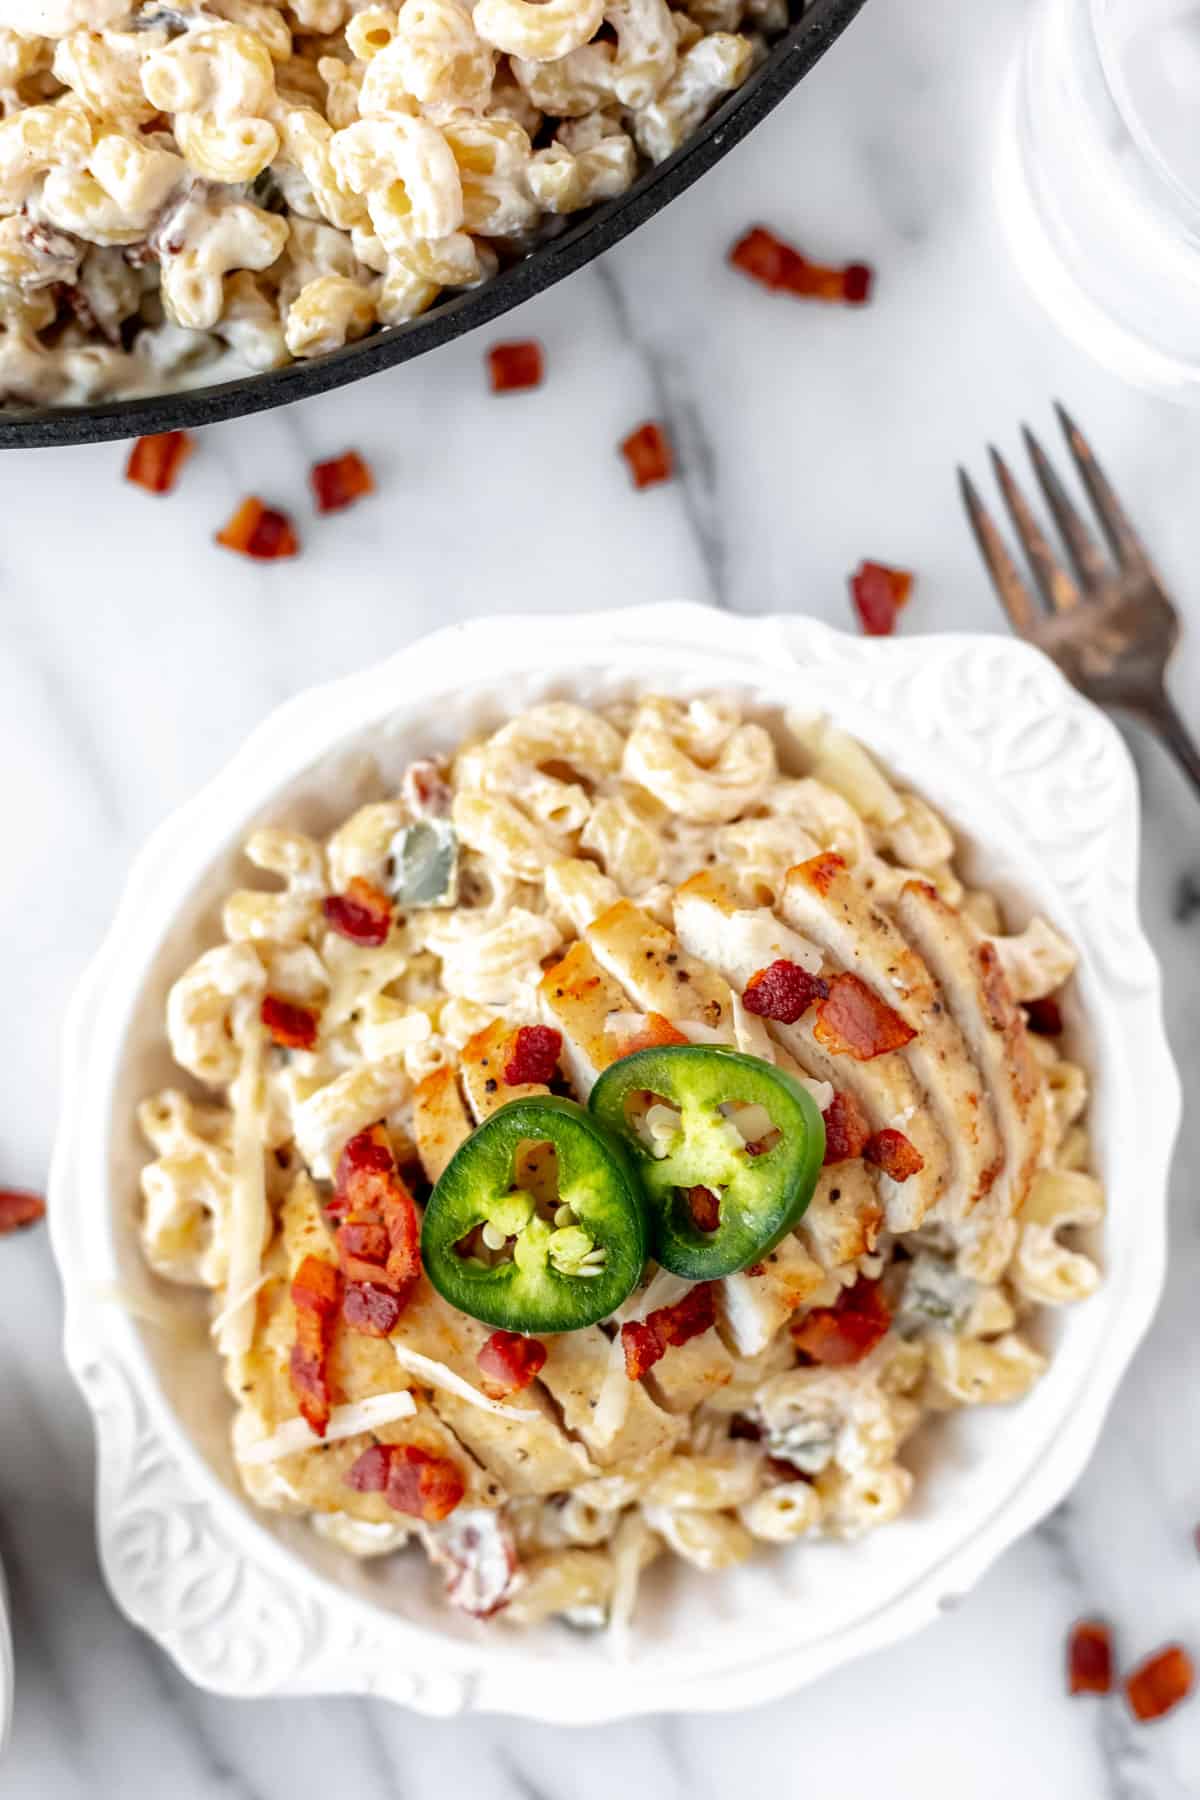
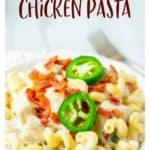
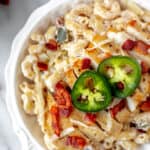
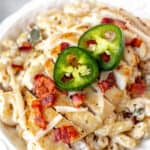
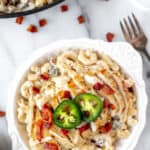
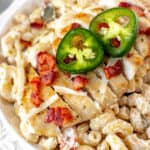
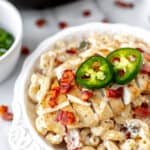
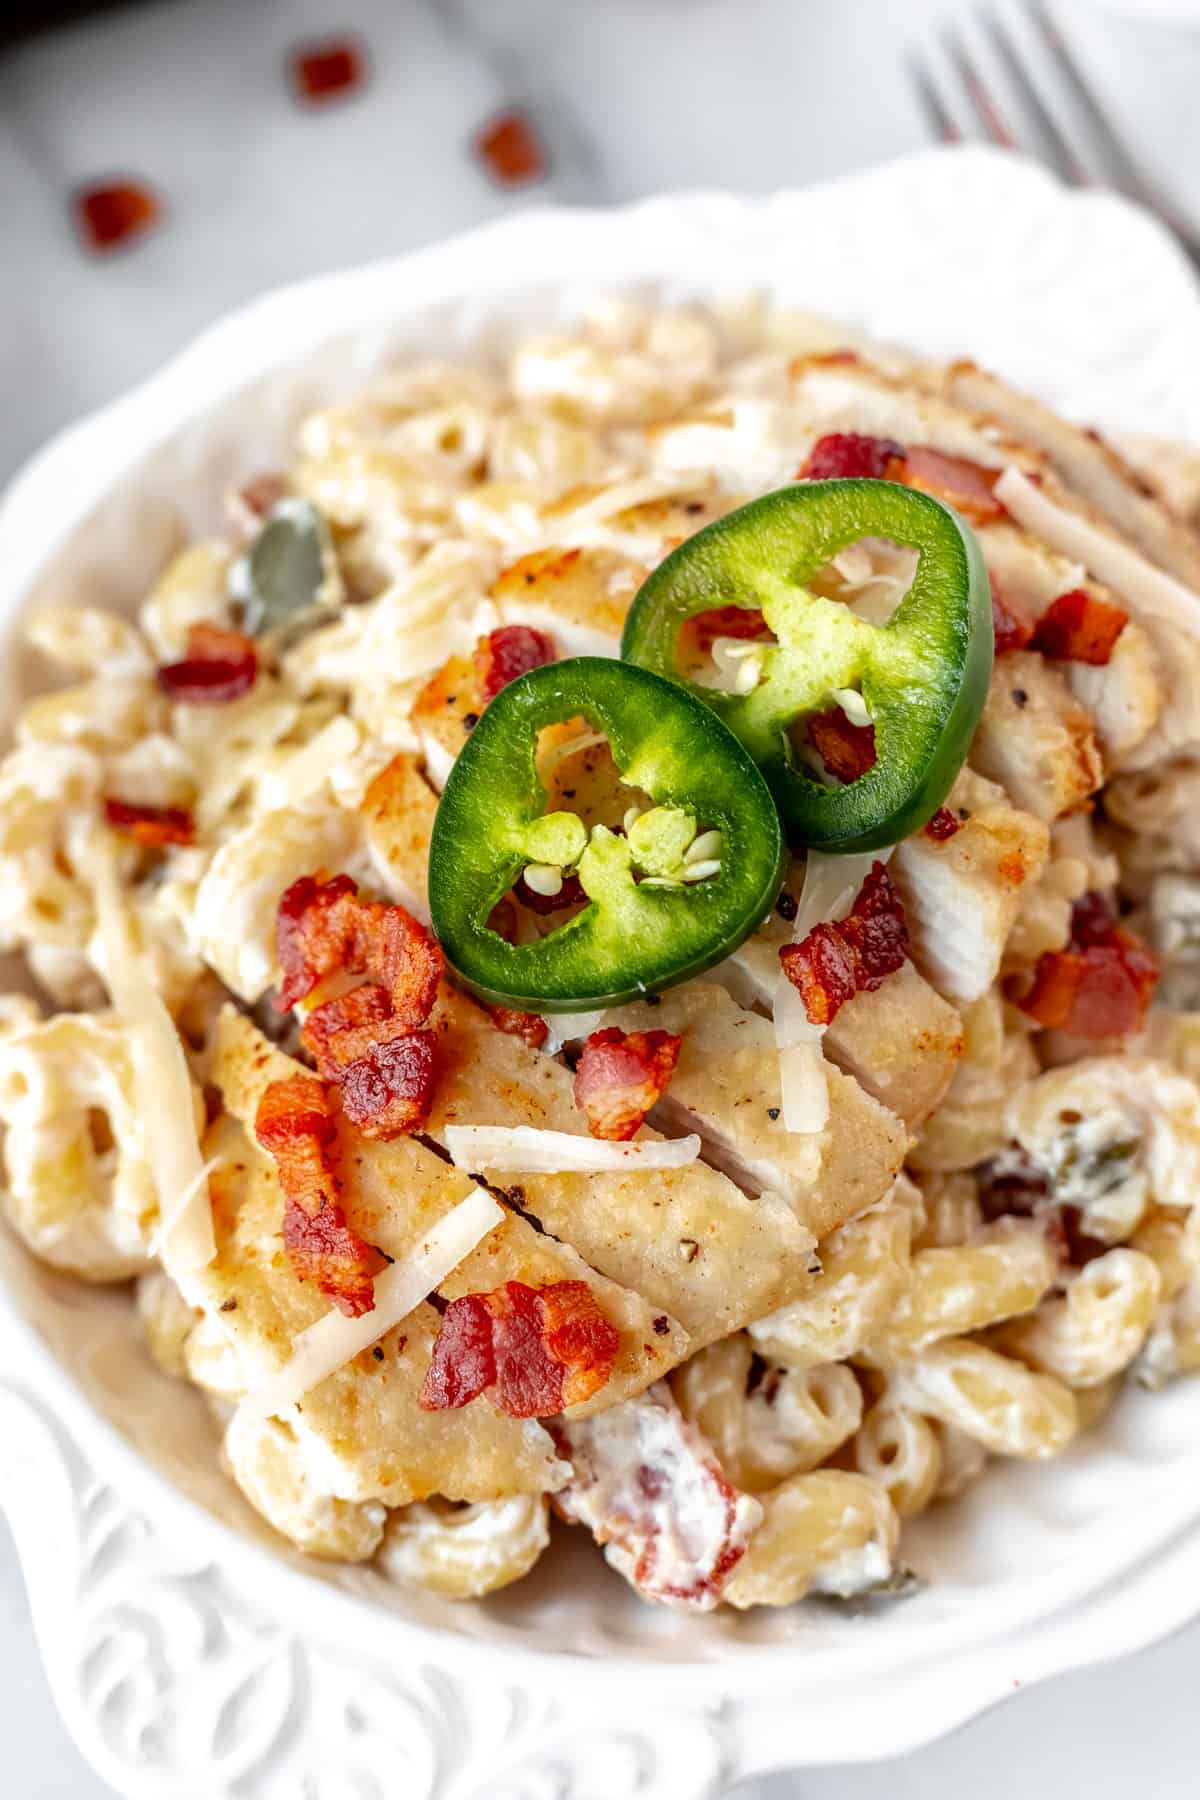
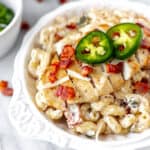
To serve, spoon the pasta into bowls. Slice the chicken and place on top of the pasta.
Garnish with the extra bacon and slices of jalapeño peppers.
Chef’s Tip: if preferred, you can dice the chicken and stir it into the pasta before serving.
Make It Low Carb
To make this recipe low carb, simply swap out the pasta for spaghetti squash or zoodles and omit the flour.
You can swap out the whole milk for unsweetened almond milk or heavy cream to reduce the carb count even more.
You may also want to try this recipe for Low Carb Jalapeño Popper Chicken Casserole.
Make It Gluten Free
To make this recipe gluten free, simply swap out the pasta for gluten free pasta, spaghetti squash, or zoodles and omit the flour or replace it with gluten free flour or cornstarch.
Tips and Techniques
- Dice the bacon by stacking it on top of each other and slicing it, horizontally, into thin strips.
- Shred the cheese from a block for the best melting and texture. Pre-shredded bagged cheese contains a starch that can make your sauce gritty.
- Remove some, all or none of the jalapeño seeds and membrane to control the level of spiciness. Removing all the seeds and membrane will give you a much milder dish.
- Store leftovers in an airtight container in the refrigerator. Consume within 3-4 days for the best results.
FAQ’s
Can You Make Jalapeño Popper Chicken and Pasta Ahead Of Time?
Yes. You can make this dish ahead of time.
It is recommended to keep the chicken and pasta portions stored separately. Reheat the pasta on the stovetop and the chicken in the oven, for the best results.
More Chicken Recipes to Try


Love this Jalapeño Popper Chicken and Pasta recipe? Follow me on Pinterest, Instagram, and Facebook for more!
If you try this recipe, I would really appreciate it if you would please leave a comment and star rating. Thanks!
Jalapeno Popper Chicken Pasta
Ingredients
- 1 pound pasta (any shape you like)
- 12 ounces bacon (diced)
- 1 1/2 pounds boneless, skinless chicken breasts (small or thin cut)
- salt
- pepper
- 1/2 cup all purpose flour (optional)
- 5 jalapeño peppers (4 diced, 1 sliced thin)
- 2 cloves garlic (minced)
- 16 ounces cream cheese (cut into 1 inch chunks)
- 2 cups whole milk
- 1 cup sharp cheddar cheese (shredded)
Instructions
- Start a large pot of salted water to boil and cook the pasta according to the directions on the package. Drain and set aside until the sauce is done.1 pound pasta
- Heat a large, deep skillet over medium heat and add the bacon. Cook until just crisp, about 7-10 minutes. Remove with a slotted spoon to a paper towel lined plate and set aside.12 ounces bacon
- Return the skillet to medium-high heat.
- Season the chicken with salt and pepper. Dredge both sides in the flour (if using) to lightly coat, shaking off any excess flour.1 1/2 pounds boneless, skinless chicken breasts, salt, pepper, 1/2 cup all purpose flour
- Cook in the bacon grease for approximately 4-6 minutes per side, or until done through and no longer pink in the center. The internal temperature of chicken needs to reach 165ºF on a meat thermometer inserted into the center of the thickest portion.
- Remove to the plate, tent with foil to keep warm and set aside.
- Drain all but about 1 teaspoon of the bacon grease out of the pan.
- Add the diced jalapeño pepper and cook, stirring often, until the peppers are tender and starting to char.5 jalapeño peppers
- Stir in the garlic and cook another 30 seconds.2 cloves garlic
- Add the cream cheese and milk and cook, stirring, until smooth and creamy, about 5 minutes.16 ounces cream cheese, 2 cups whole milk
- Remove the pan from the heat and stir in the shredded cheddar cheese until melted and well combined.1 cup sharp cheddar cheese
- Once the cheese is all melted, add about 3/4ths of the bacon.
- Stir the pasta into the sauce.
- To serve, spoon the pasta into bowls. Slice the chicken and place on top of the pasta.
- Garnish with the extra bacon and slices of jalapeño peppers.
Notes
Tips and Techniques
- Dice the bacon by stacking it on top of each other and slicing it, horizontally, into thin strips.
- Shred the cheese from a block for the best melting and texture. Pre-shredded bagged cheese contains a starch that can make your sauce gritty.
- Remove some, all or none of the jalapeño seeds and membrane to control the level of spiciness. Removing all the seeds and membrane will give you a much milder dish.
- Store leftovers in an airtight container in the refrigerator. Consume within 3-4 days for the best results.
Nutrition
This recipe was originally published on April 19, 2016. It was updated with new images, step-by-step instructions, tips, techniques, and FAQ’s in March 2024.